Getting Started
Welcome to OpenTTD!
OpenTTD is an open source reimplementation of Transport Tycoon Deluxe by Chris Sawyer. In this game, you take on the role of the CEO of a transportation company. The goal of the game is to build and expand an efficient and profitable transportation network consisting of rail, road, sea, and air routes.
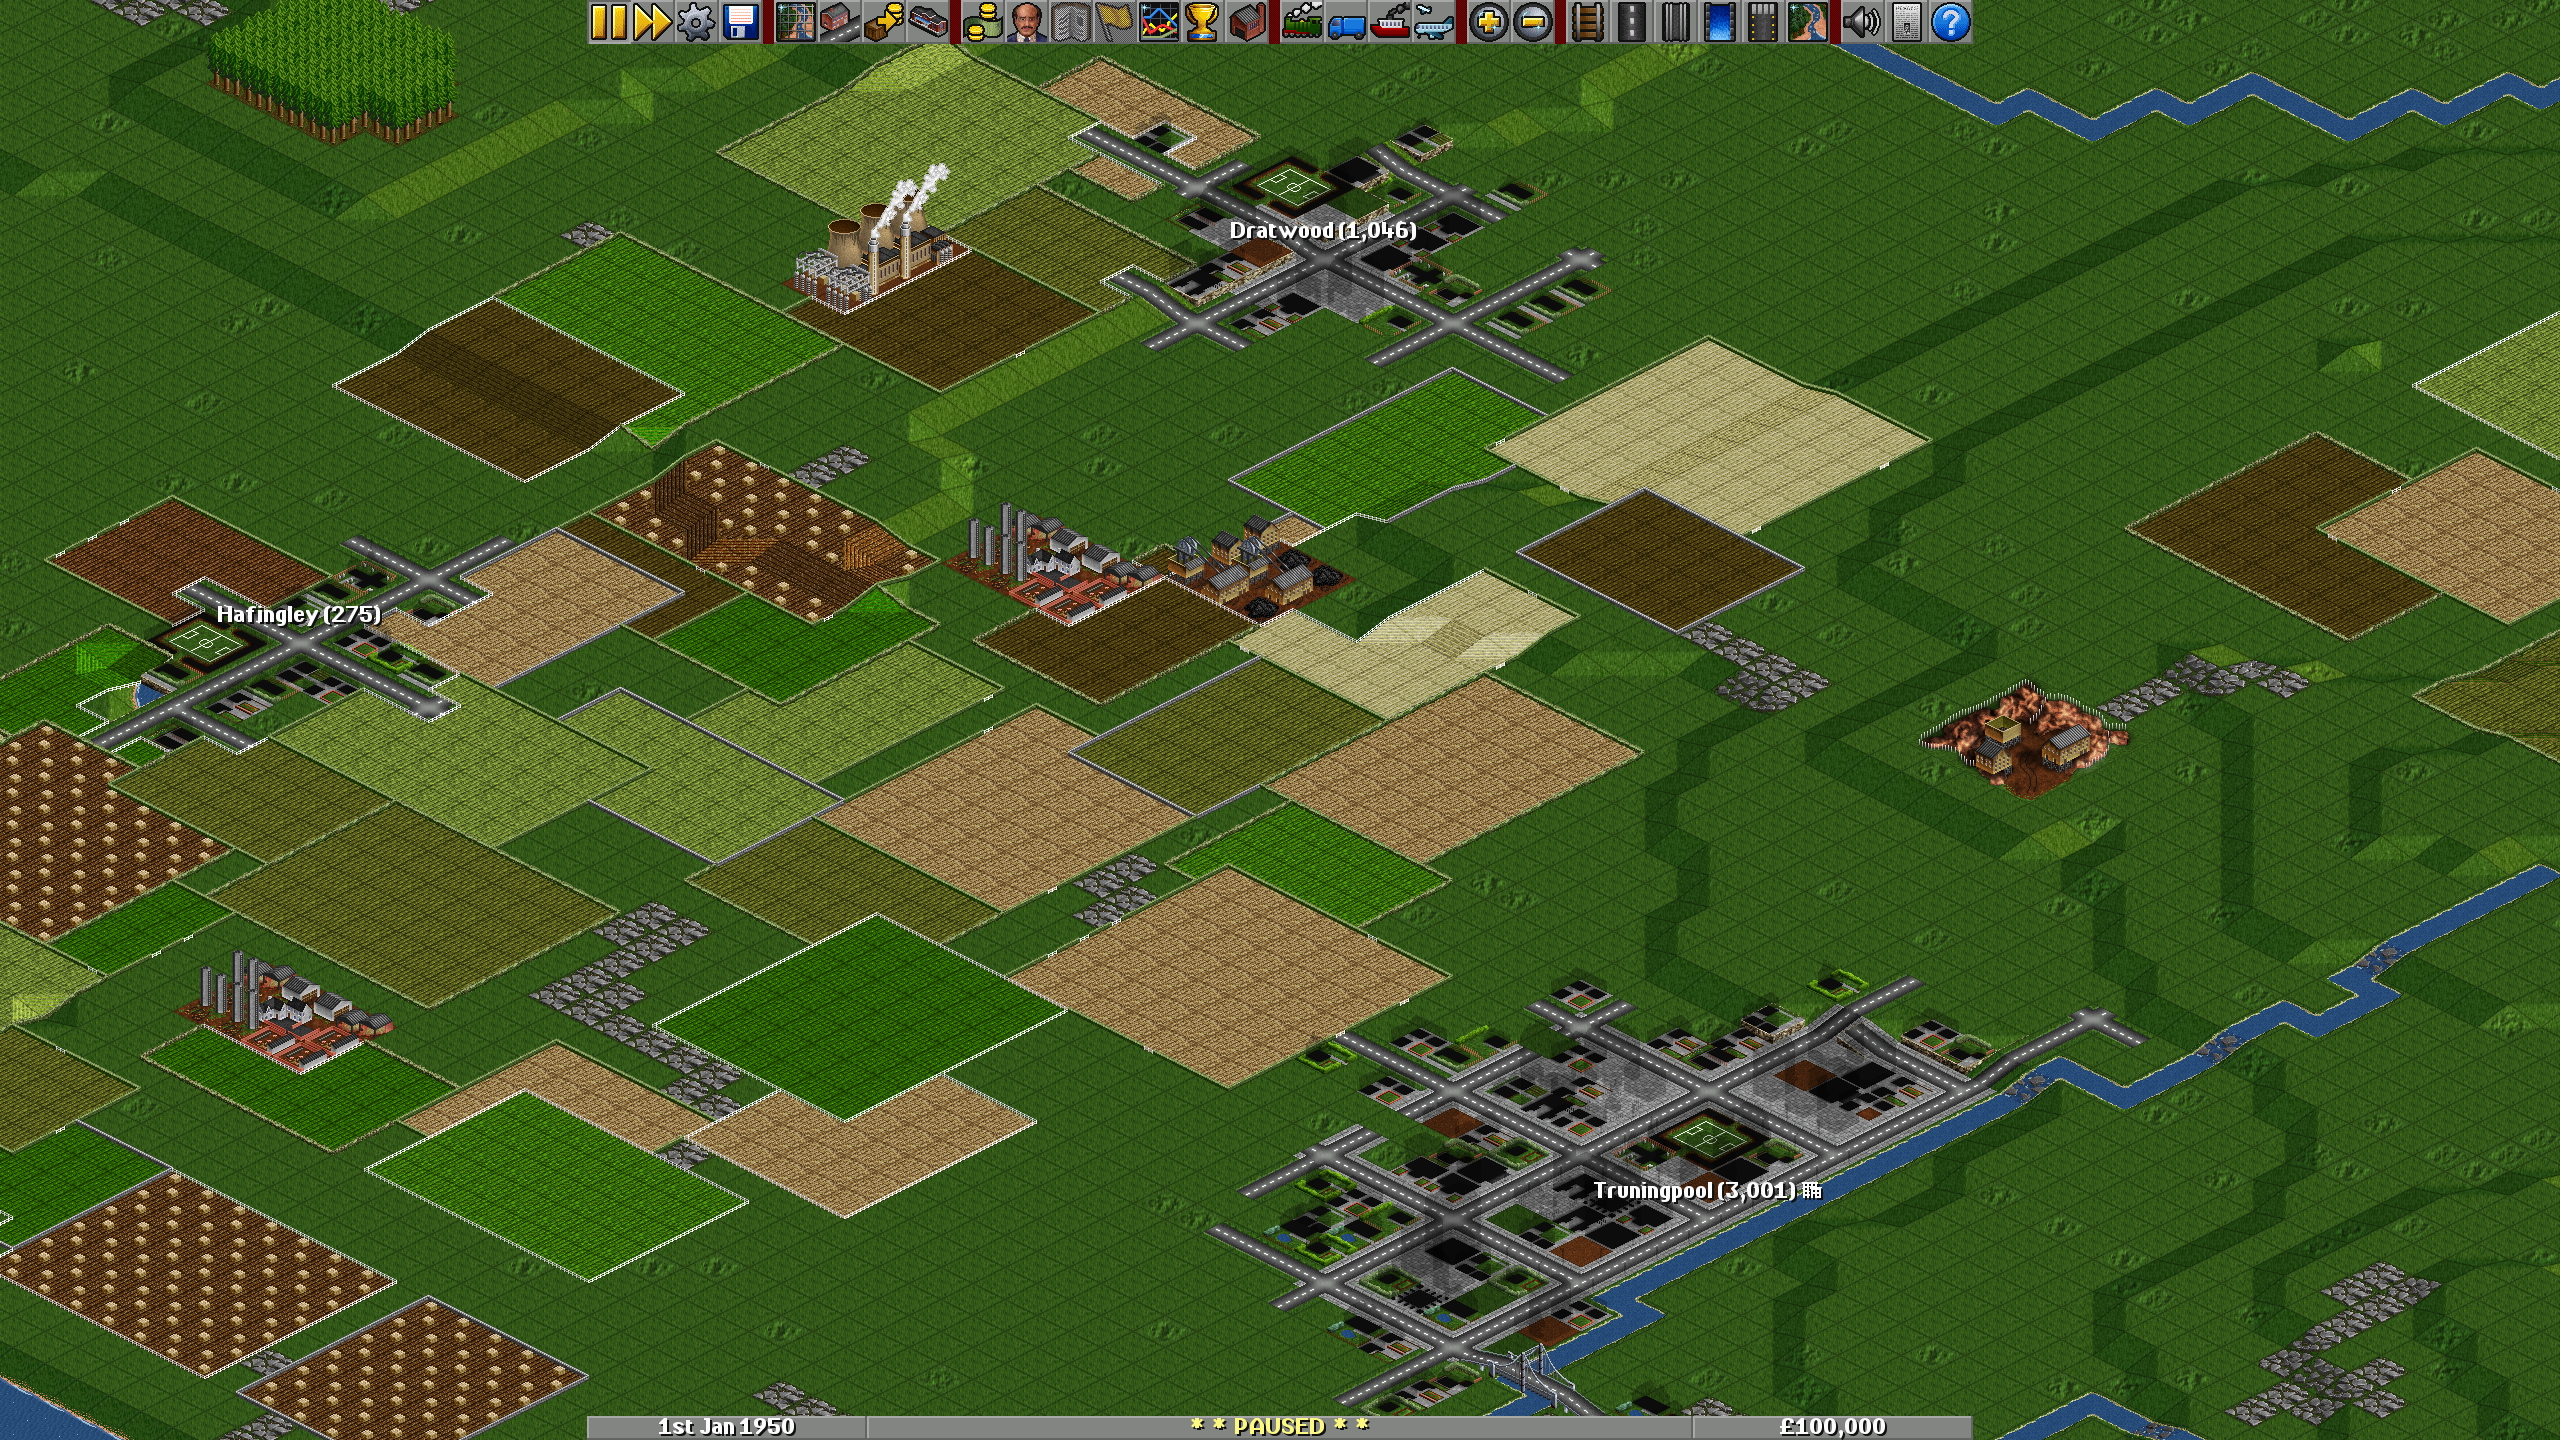
When you start a new game, you are presented with a randomly generated map to build your transport empire on.
In OpenTTD rail transport is the star of the show. So let's start by laying our first tracks. Click the rail icon to access the track construction mode. By default, the game begins in 1950, in which only one type of track is available. More track types become available as the years go by.

This opens the railway construction tool bar. The buttons from left to right:
NOTE: You can combine the build toolbar with the landscaping toolbar in advanced settings. Landscaping is a separate tool.

| Button | Function |
|---|---|
| Diagonal track (N-S) | Places a diagonal track piece north to south. |
| Straight track (SW-NE) | Places a straight track piece south-west to north-east. |
| Diagonal track (W-E) | Places a diagonal track piece west to east. |
| Straight track (NW-SE) | Places a straight track piece north-west to south-east. |
| Auto track | Places track pieces in any direction. |
| Demolish | Clears the selected tiles. |
| Train depot | Places a train depot to build trains and for train to get maintenance. |
| Waypoint | Places a waypoint onto train tracks to control train routes. |
| Station | Places a station for trains to load/unload cargo. |
| Signals | Places signals along train tracks to stop trains when a railway is occupied by another train. |
| Bridges | Places bridges across water and other obstacles. |
| Tunnels | Places tunnels throught hills. |
| Remove | Toggles the current build tool into remove mode. |
| Convert/Upgrade | Changes the selected area of tracks into the currently selected track type. |
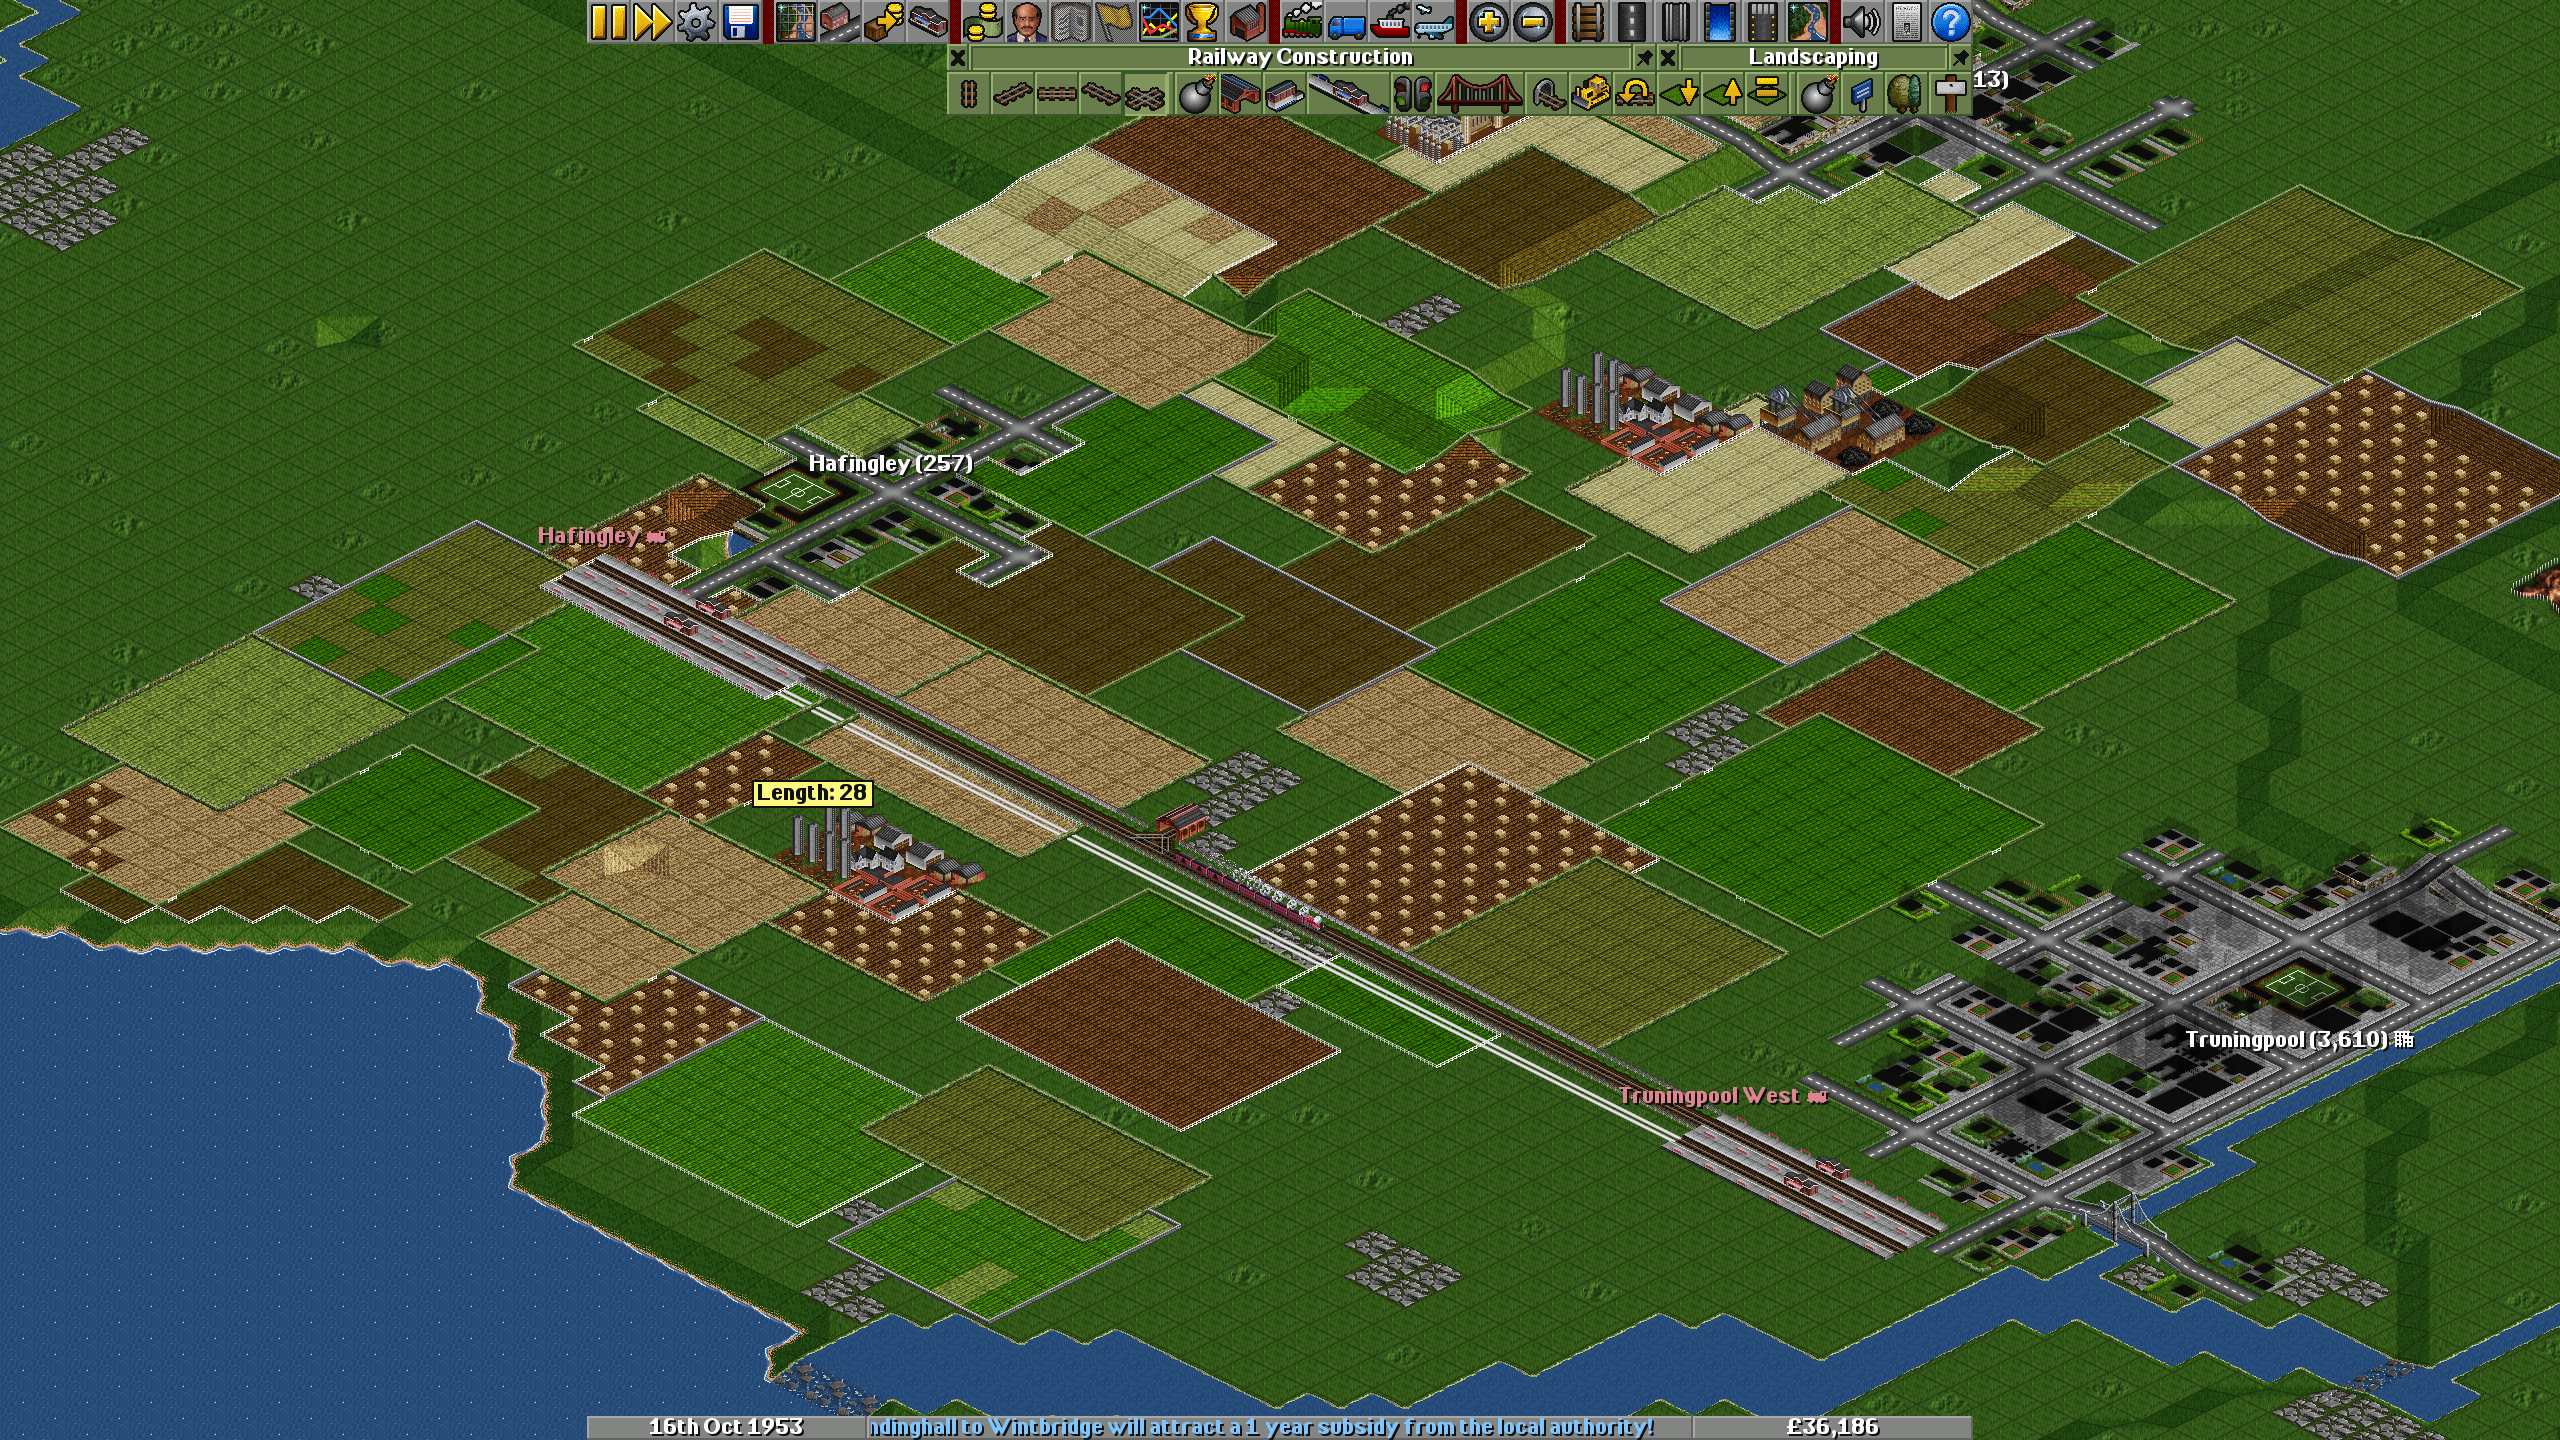
The simplest railway in this scenario would be a passenger line that connects Hafingley and Truningpool.
Stations can only be built facing in one of two directions. You can either build them by dragging and dropping or select from a preset number of tiles the station is to be built long and wide. Don't worry if you want to expand later, stations can be build on top of tracks to accomodate longer trains.
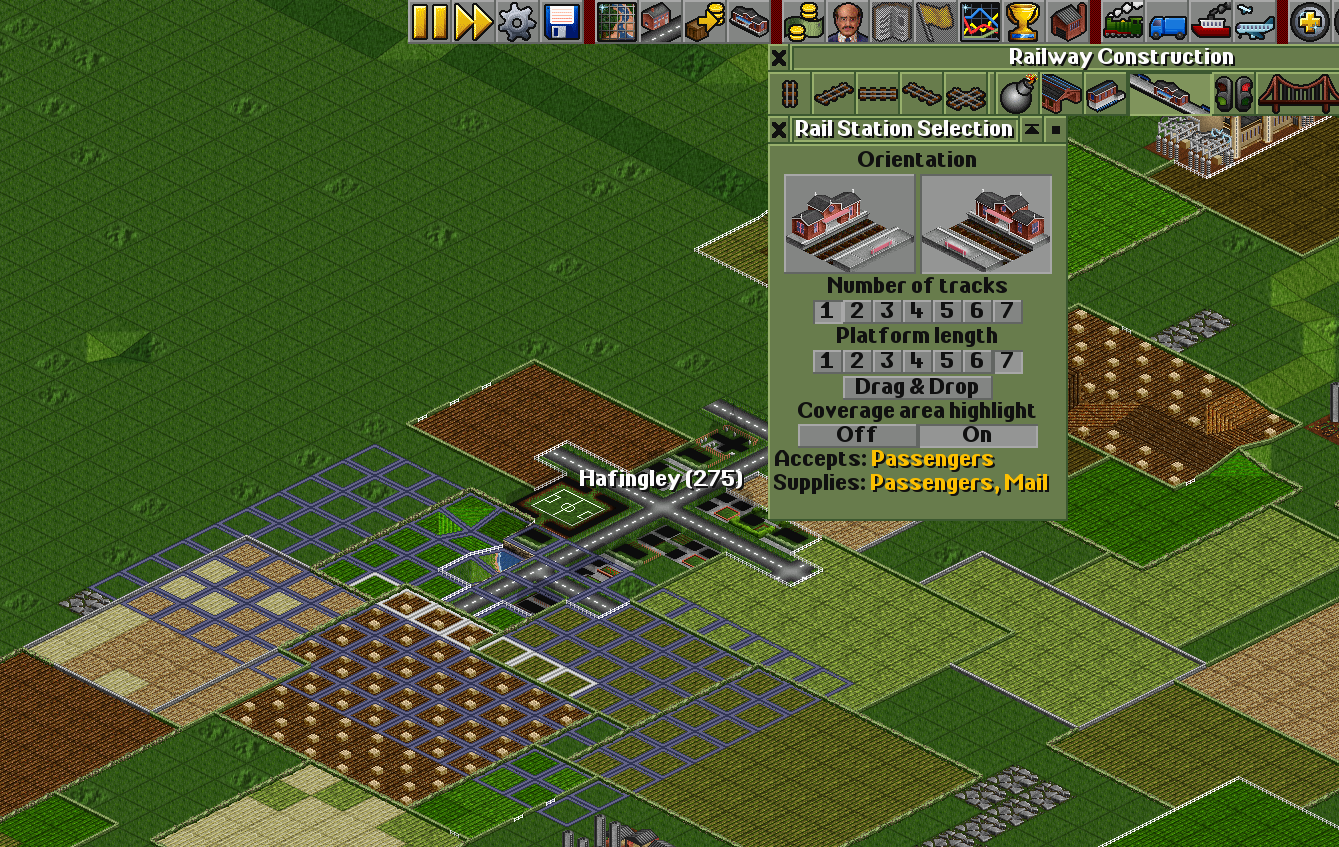
It's a good idea to enable the coverage area highlight. It visualizes which tiles (in this case houses of a town) the station will be able to service. You'll also see what the station will accept and supply. This list updates with more cargo types as you move the station closer to the town. The more houses a station covers, the more types of cargo it will accept and supply. You should aim to catch as many tiles of a town as possible.
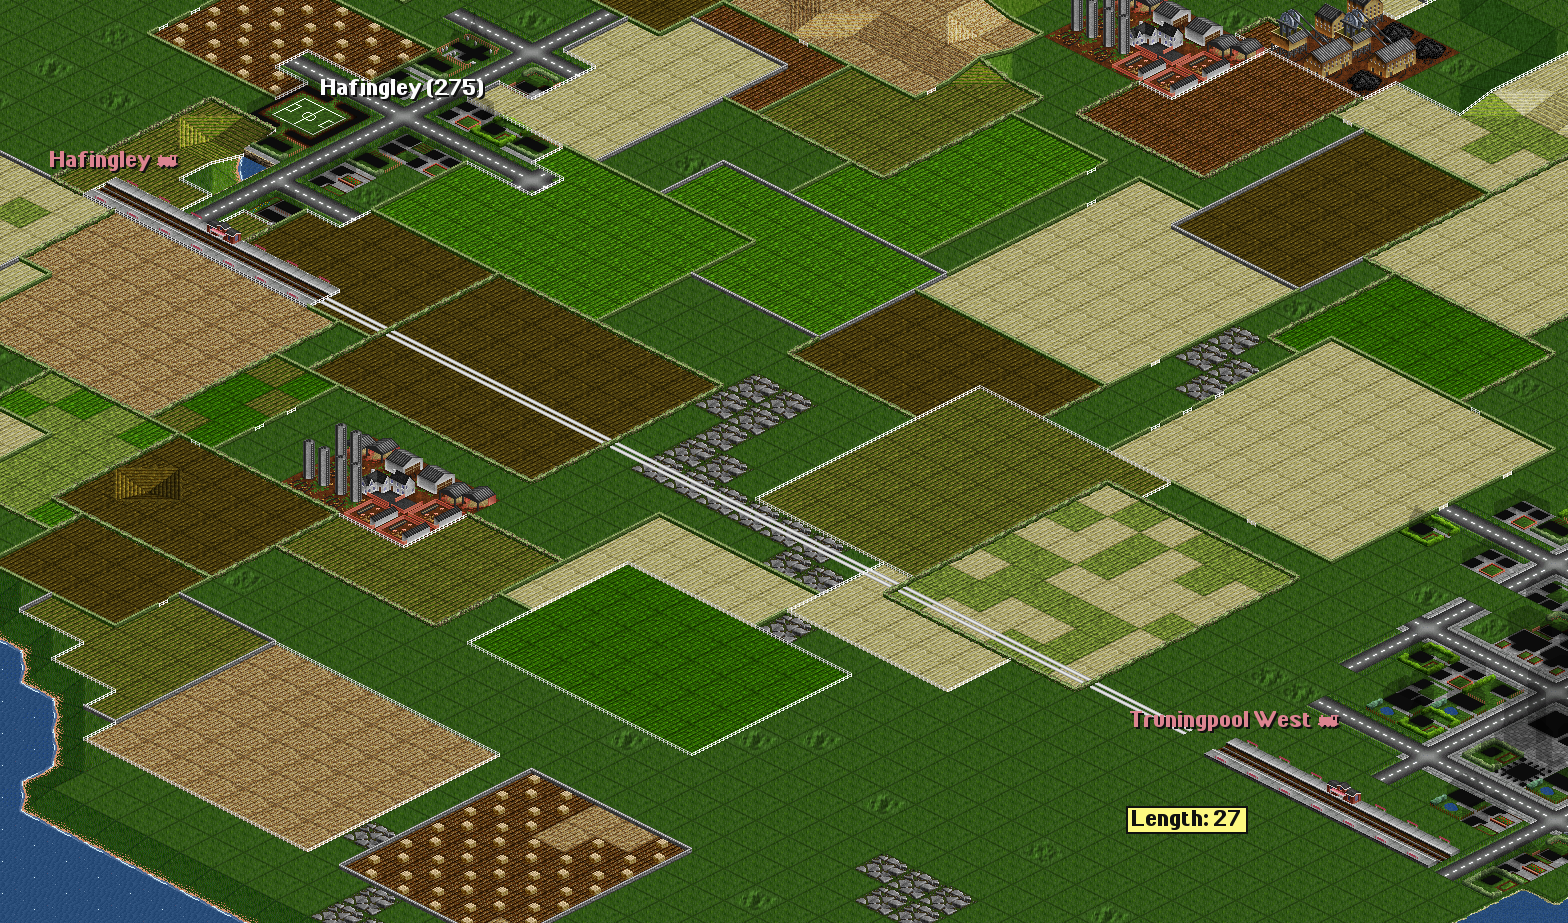
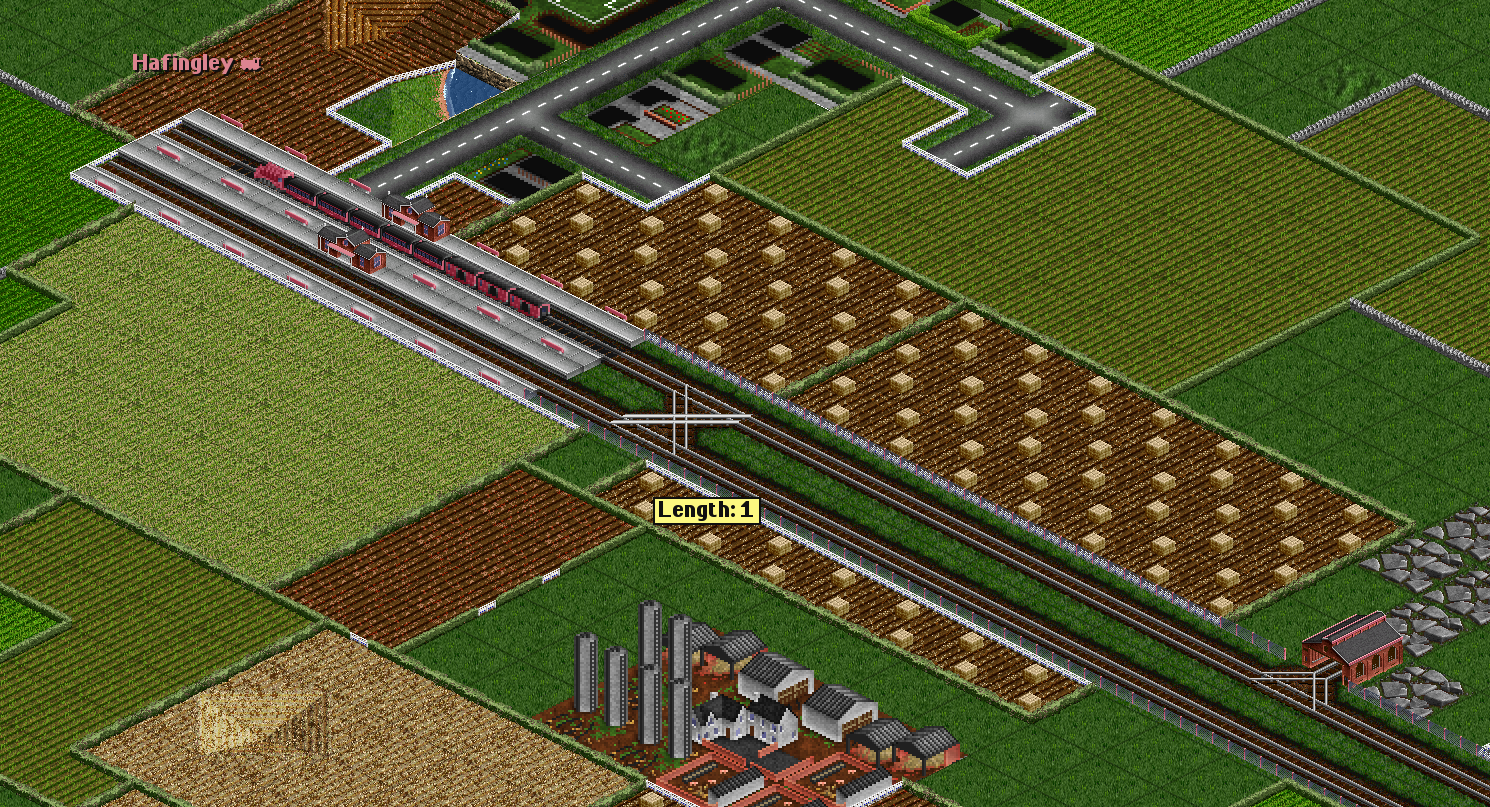
Build another station at the destination and connect them with a piece of track.
In order to start transporting passengers and mail between two towns, we obviously need a train. These are built in the train depots. Select the train depot tool and place a depot next to a piece of track.
NOTE: You can also place a depot at the end of a station, but this is inefficient, as trains going into a depot slow down significantly and block other trains from entering the platform until the train has fully entered the depot.
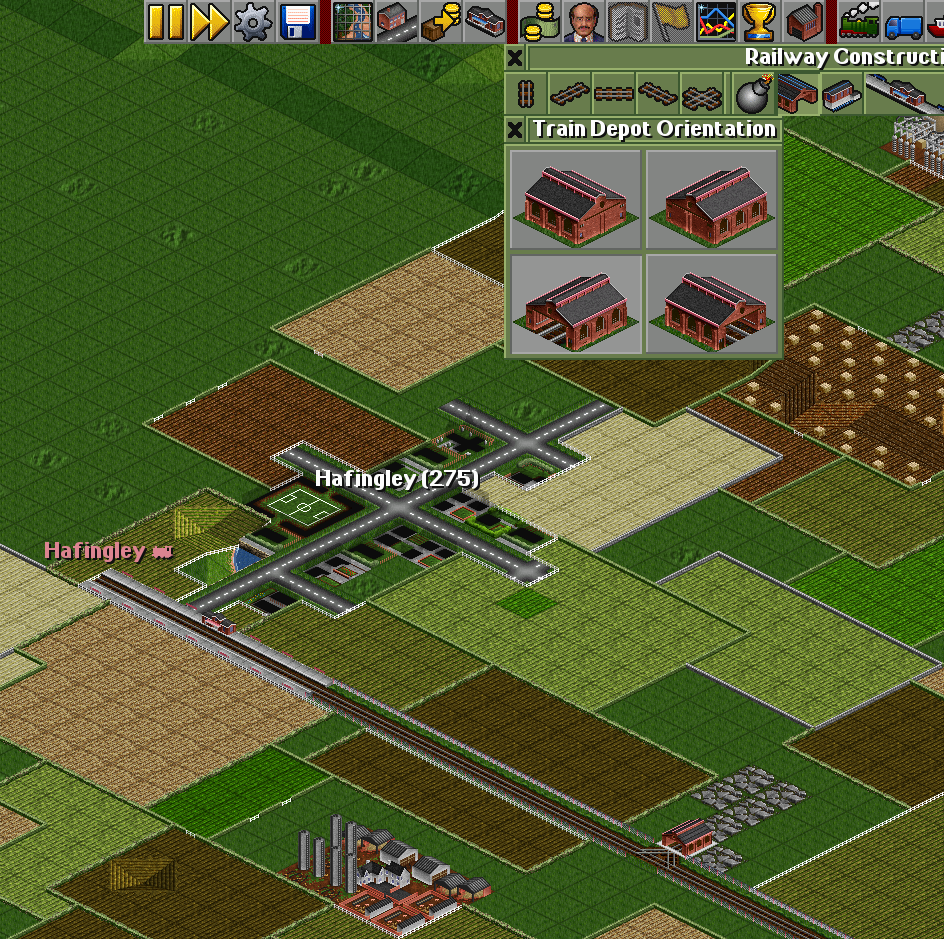
Click on the depot to start building your first train. The depot window shows a list of all trains currently in the depot, which right now is empty. Click on New Vehicles to open a list of engines and different cargo carriages.
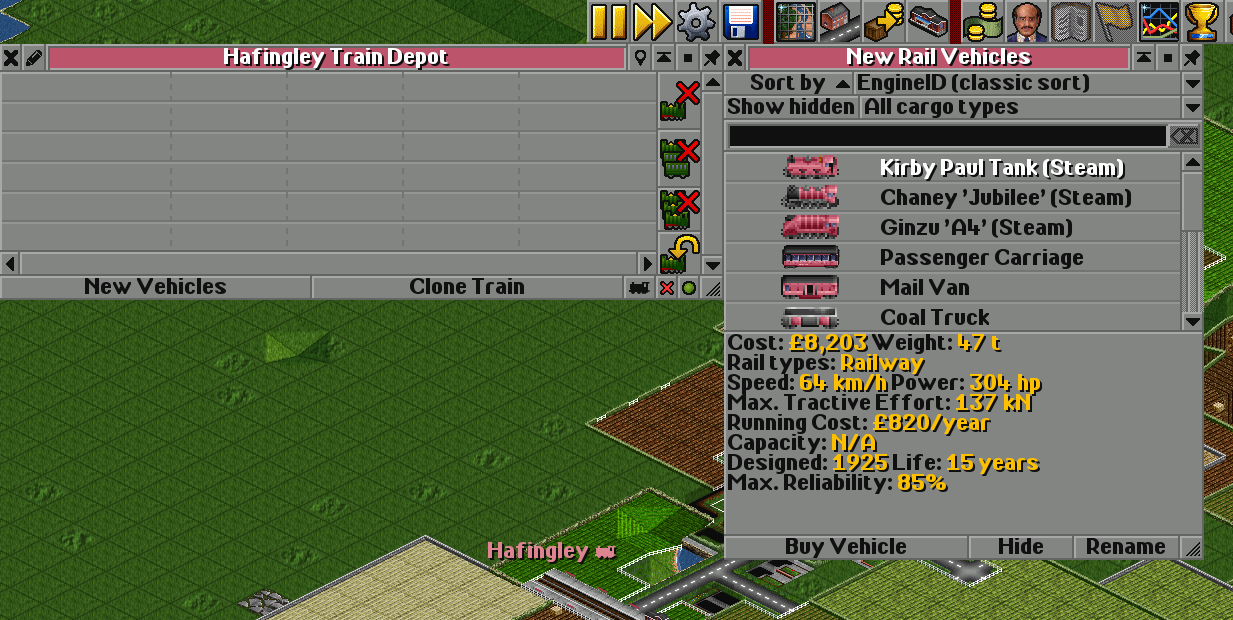
Start with an engine that fits your needs. Different engines have different stats, ranging from slow but cheap to fast and expensive. Also consider their reliability, as trains with a low reliability break down more often. Breakdowns delay delivery of cargo, costing your time and money because the longer cargo is in delivery, the less you will be paid.
When you decided on an engine, continue with your cargo carriages. As we're trying to build a passenger railway, the Passenger Carriage is the right choice here. Stations in towns also produce mail, but less so than passengers, so append a few Mail Vans as well.
NOTE: Cargo carriages have a set amount of cargo that each of them can carry. Smaller towns like this will likely not produce much cargo. Bigger towns like the one on the other end of the line, however, will. Plan ahead accordingly so you don't overprovision your trains!
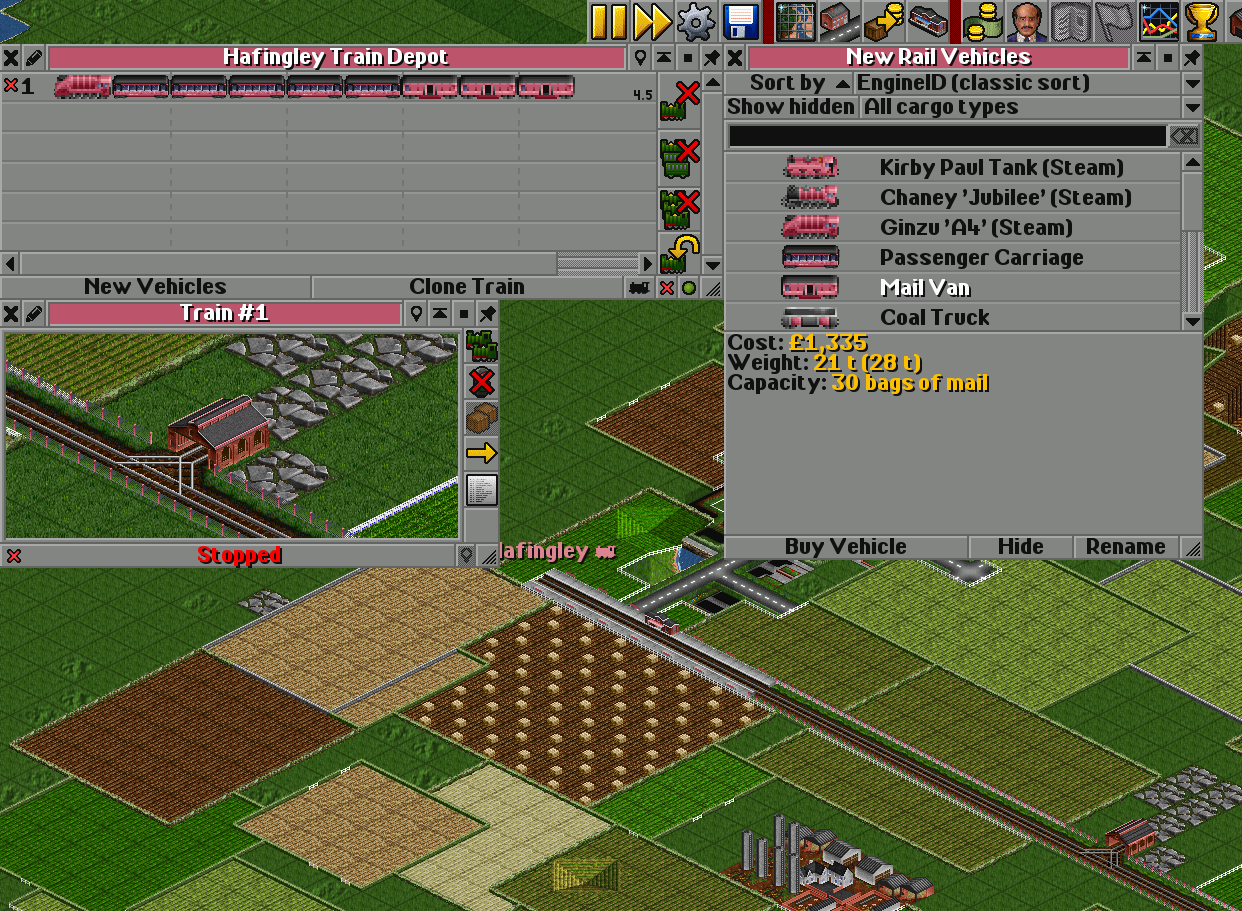
When purchasing a new engine, a status window for that train will pop up. The window shows the train's current location, its current status and a few action buttons. From top to bottom:
| Button | Function |
|---|---|
| Clone | Clones the train with the same set of carriages and orders. Hold down Ctrl to create clones with shared orders. |
| Ignore signal | Makes the train pass a red signal. USE WITH CAUTION! |
| Convert cargo | Convert to a different type of cargo (only available for ships and planes). |
| Orders | Opens the list of orders. |
| Details | Shows details about the train, such as max speed, reliability, cargo capacity, etc. |
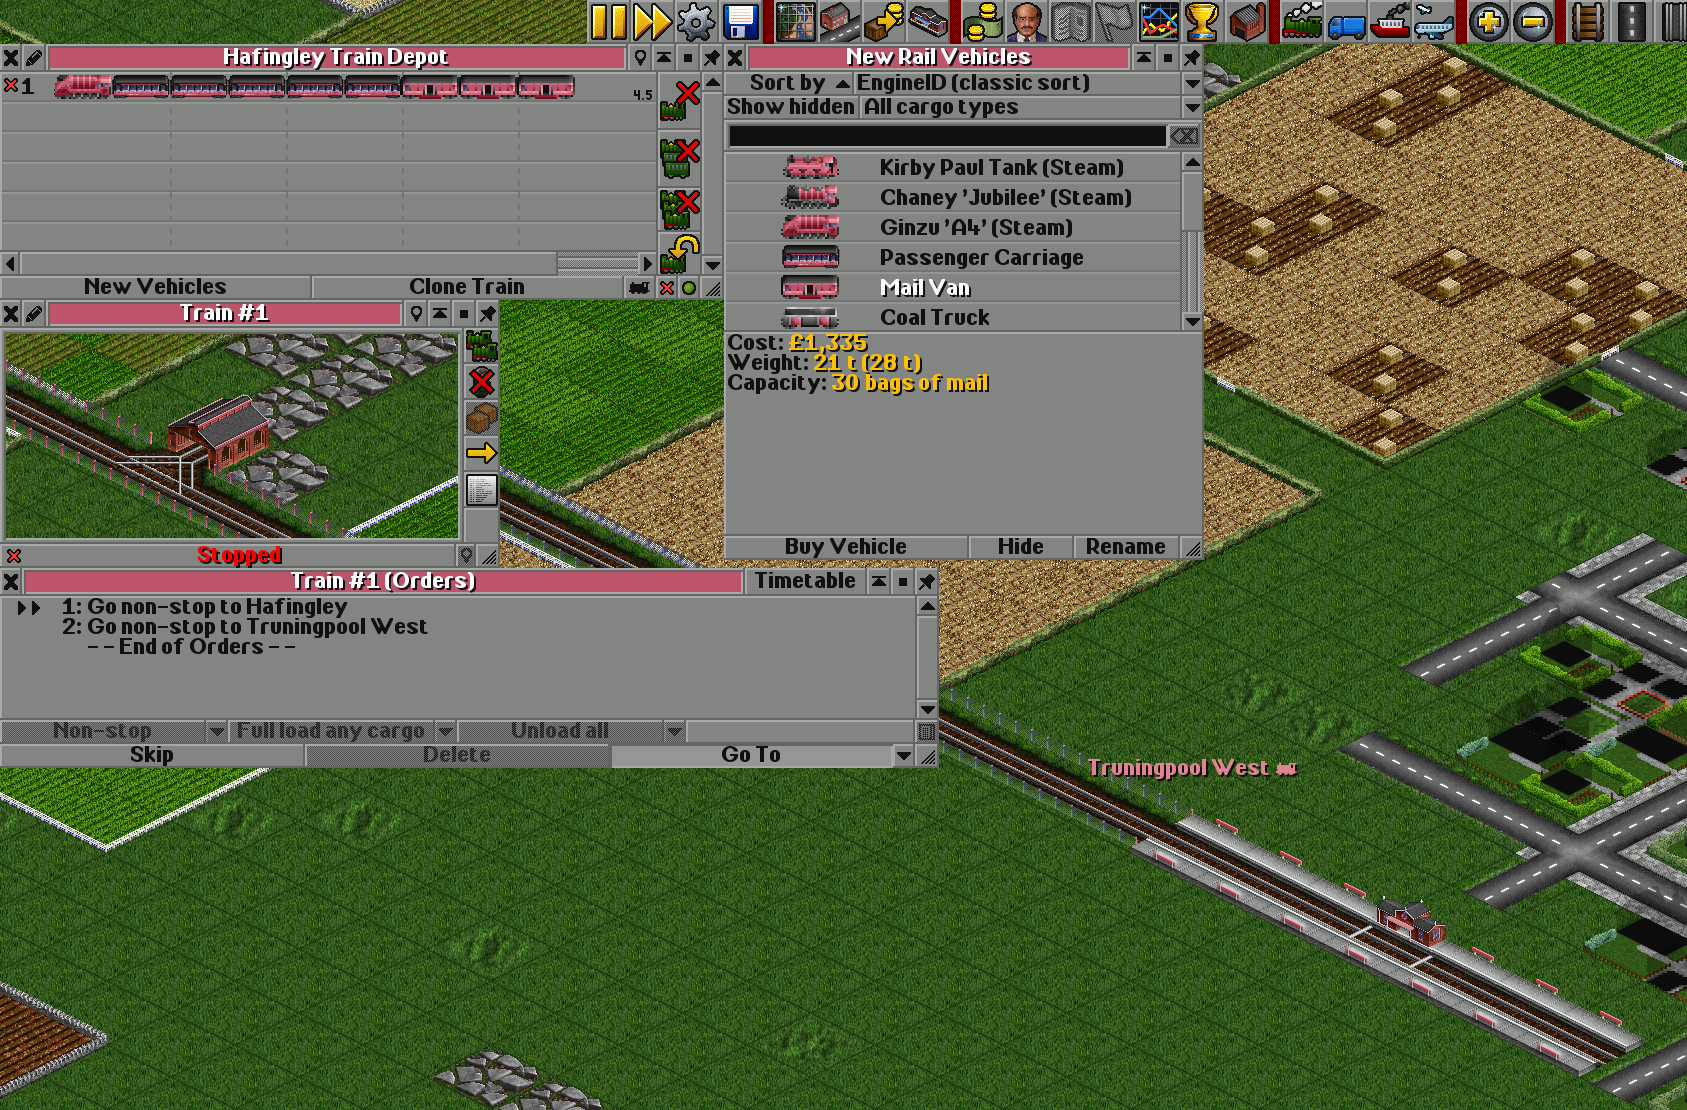
We need to tell our new train where to pick up and drop off passengers and mail. Click on the bright, yellow arrow to open the train's list of orders. Click Go To (or press the G key on your keyboard) to start assigning destinations. Scroll the map to the stations you'd like the train to go and click on the station with the Go To selection. The train will process orders in the exact order as it appears in the list of orders. Don't worry if you change your mind, orders can be rearranged via drag & drop.
With the orders set, our train is ready to head off. Click on the button at the bottom of the train status window (currently saying "Stopped" in red) to send it off.
As you will see, the train shuttles back and forth between the two stations and generates a profit every time it drops off passengers and mail.

We can scale our rail line up with an additional train to deliver more cargo more frequently! But how would we do that? Currently there's only a single track and the trains would have not way to avoid crashing into each other.
Luckily, trains ins OpenTTD are smart enough not to go onto tracks currently occupied by an oncoming train. Whether a track is free or not is indicated by a darkened track. Trains will not enter the track as long as an oncoming train is occupying it.
However, there's still the problem that the current train will alway occupy the entire track for itself. A second train will never be able to enter. The solution lies in expanding the station and laying a second piece of track!
For trains to be able to avoid each other, place a crossing down in front of the station.
Now we need to build a second train. It's a good idea to also place a depot on the other train track as well, so trains can pick and choose in which direction they go into a depot for maintenance and to reduce the likelyhood of a breakdown, holding up traffic.
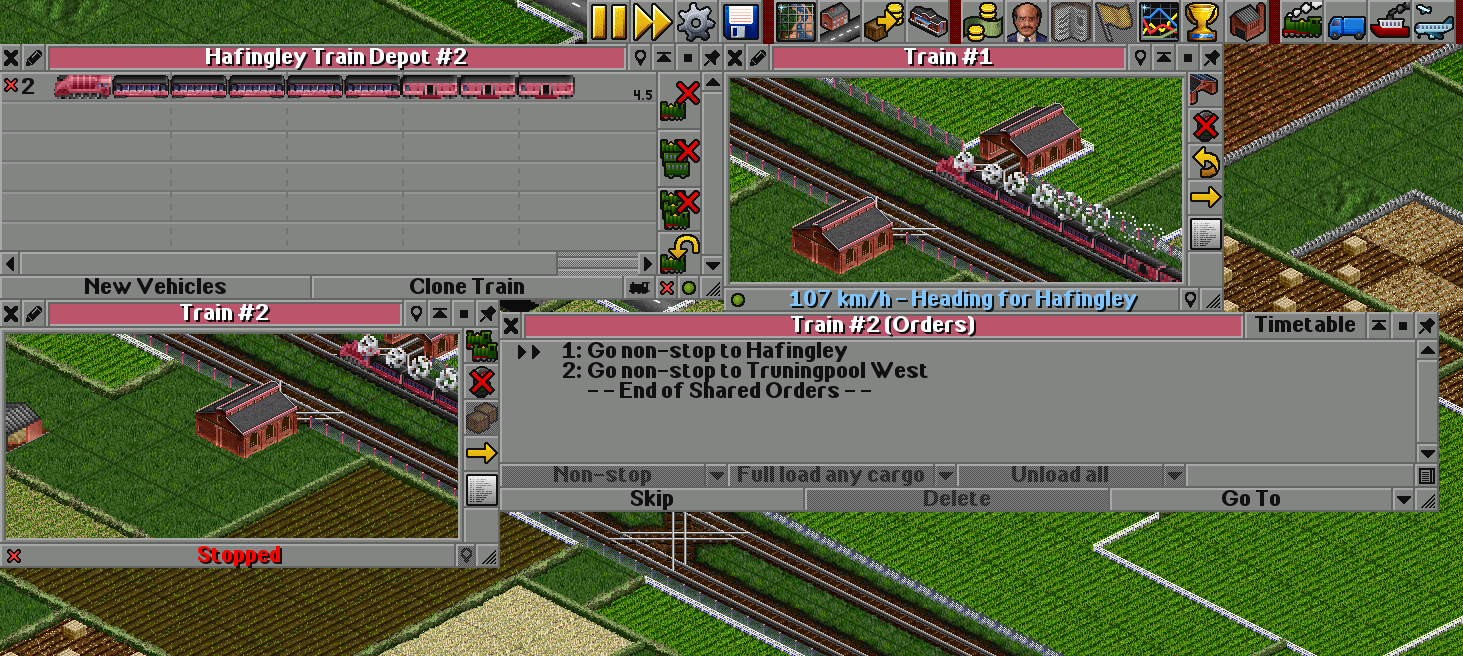
Building a second train is a lot easier by cloning the first one. Additionally, since both trains are teaming up, it makes sense to have them share their orders. Sharing orders between vehicles in OpenTTD makes managing them a lot easier and faster, since a change for one vehicle in the group will be applied to every other vehicle in the group.
Open the vehicle list of a depot, and this time select Clone Vehicle instead of New Vehicles. With the clone selection, while holding down Ctrl, click on the train currently shuttling both stations. A new train with the exact same setup and orders will appear on the list. Check the new train's list of orderes and you will indeed see it now says "End of Shared Orders", indicating that orders of this train are shared with one or more other trains.
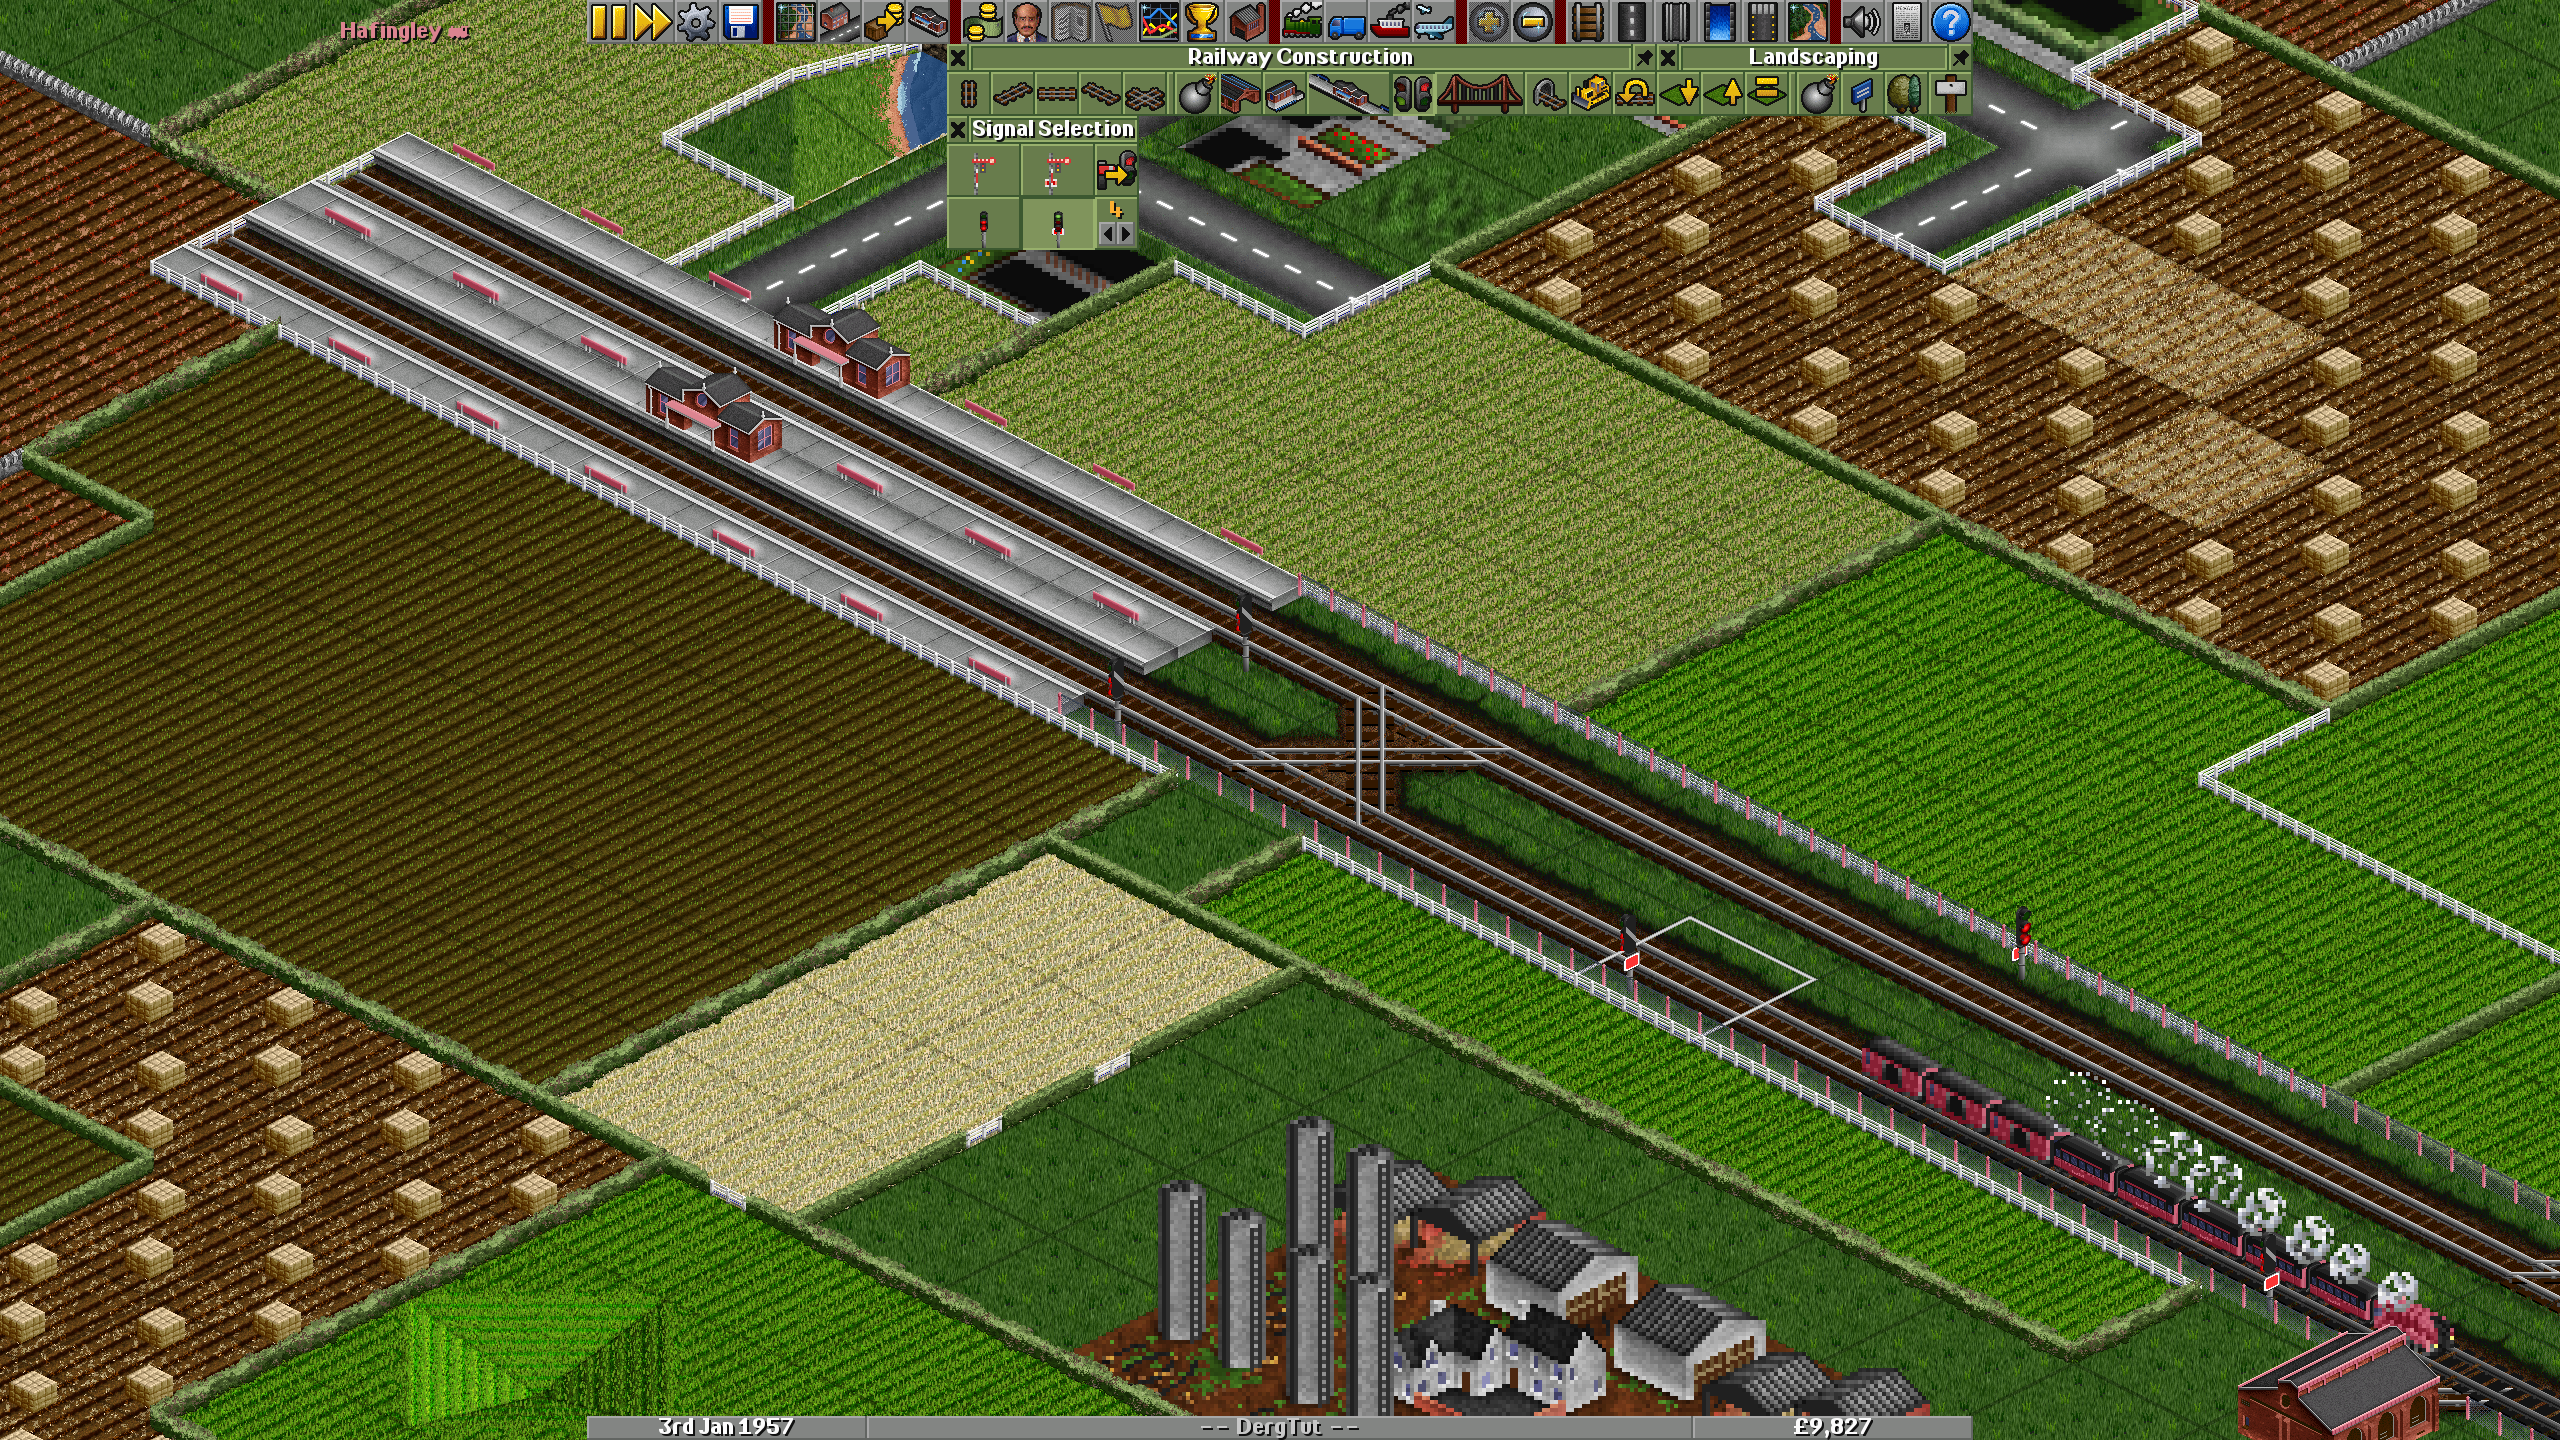
At this point, it's worth talking about signals. There's two kinds: semaphores and electric. They are purely cosmetic, however, and don't affect gameplay in any way. The differentiating factor comes into play whether they are regular path signals or one-way path signals. As their name implies, one-way path signals allow a train to pass a signal only from one direction, but not the other. This allows for tight control over the exact flow of traffic in a rail network, which becomes more important the more complex your rail network becomes.
The most common places to put up signals is before merges of tracks or crossings — which our network does not have… yet!
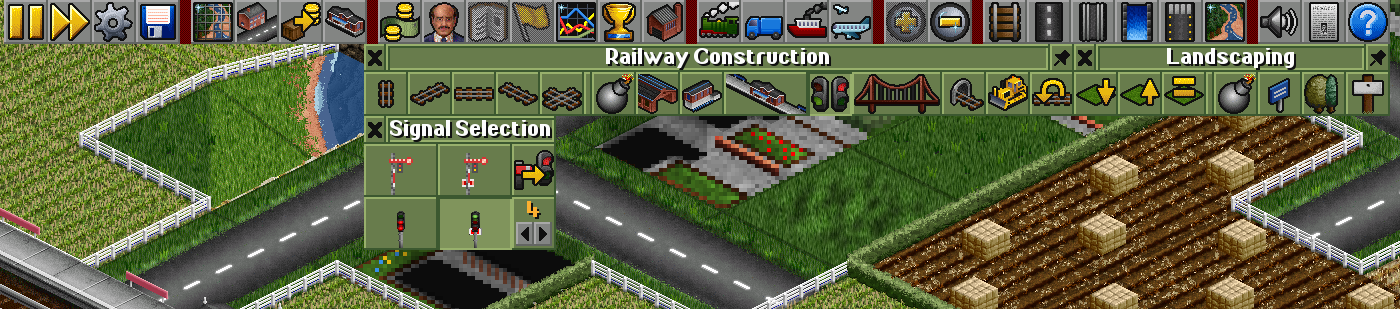
The signal selection is rather straightforward. The buttons left to right, top to bottom:
| Button | Function |
|---|---|
| Path signal (semaphore) | Places a semaphore path signal on a track. |
| One-way path signal (sempahore) | Places a one-way semaphore path signal on a track. |
| Convert path signal | Changes a path signal to a one-way signal and vice-versa. |
| Path signal (electric) | Places an electric path signal on a track. |
| One-way path signal (electric) | Places an electric one-way path signal on a track. |
| Signal distance | Sets the distance between signals when dragging along a track. |
To place a signal, select the type you want and click on a piece of track to place it. Clicking the signal again will change its direction. Clicking while holding Ctrl changes a regular path signal into a one-way signal and vice-versa.
Signals for our little passenger rail line could look something like this: one-way path signals make the arriving trains take the right track, departing trains go on the left. Additional path signals are placed right before the station to give way to arriving trains but still allowing them to pass the signal from the other side.
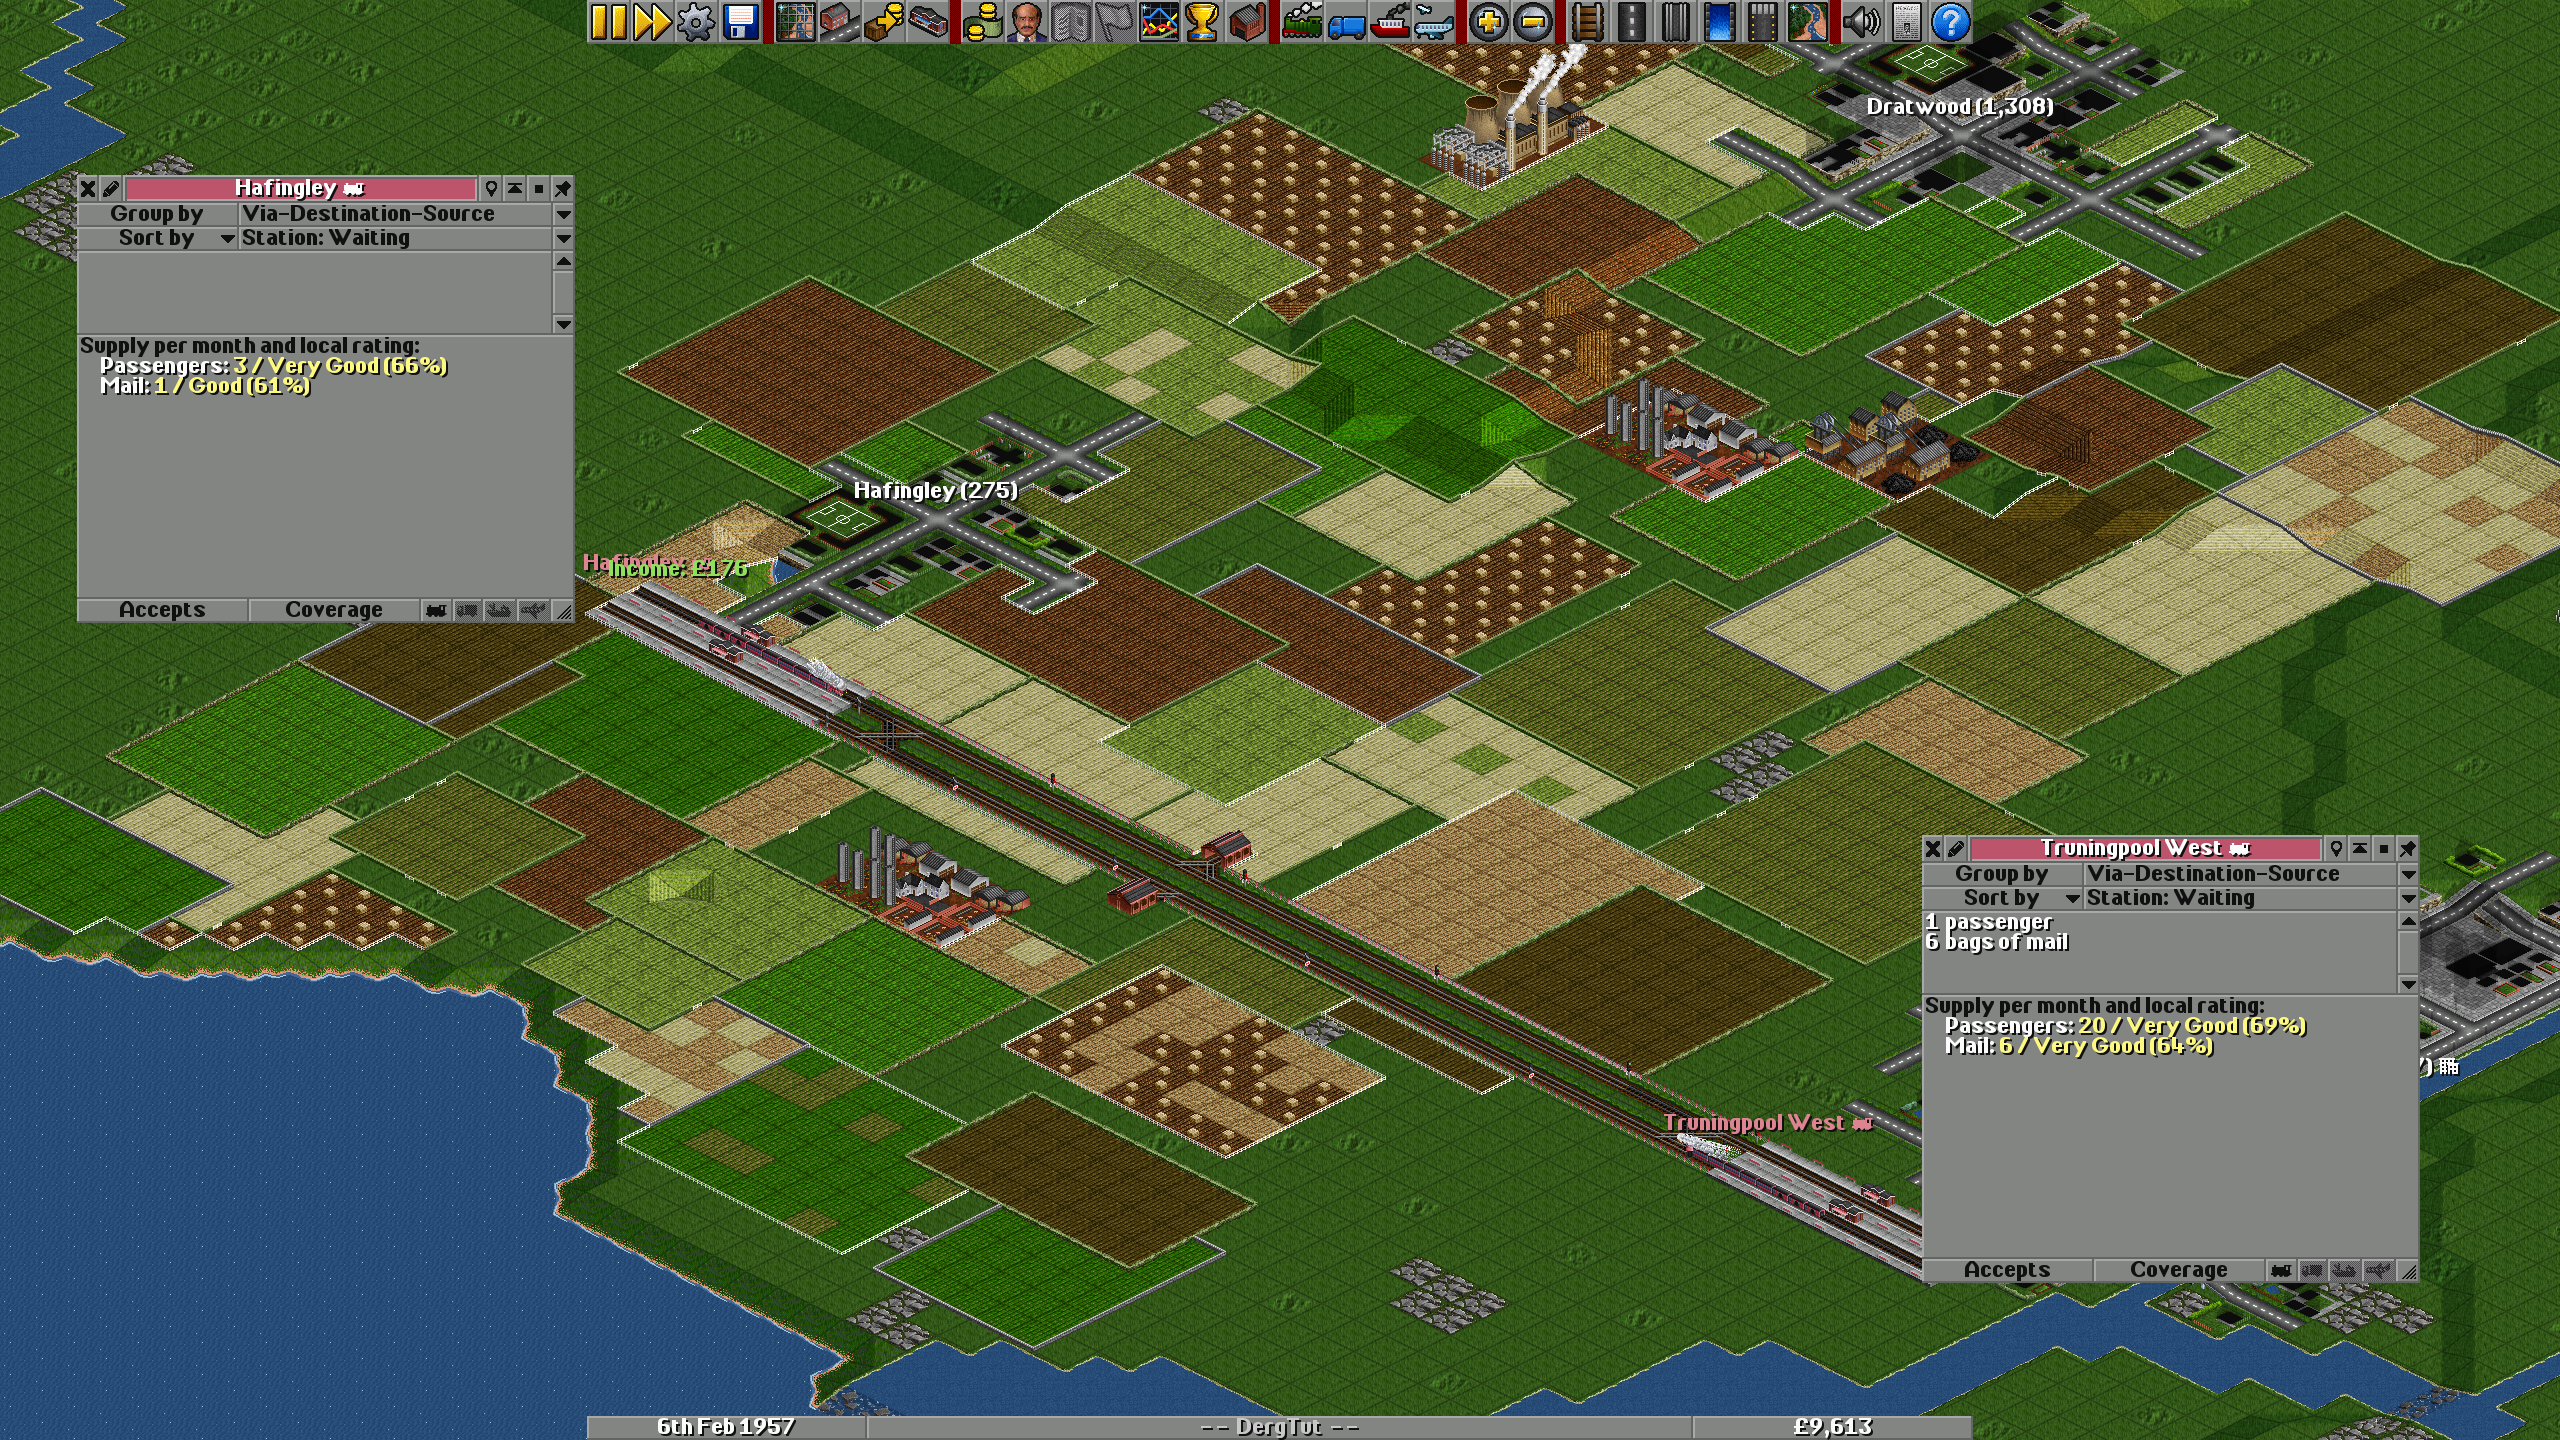
Stations get a rating depending on how often cargo gets picked up. The more frequent trains arrive to pick cargo up, the better that station's rating will be. A station with high ratings will produce more cargo over time. More cargo means more profit! But as more cargo is produced, you might get incentivized to build more vehicles to not keep cargo waiting at a station for too long. Keep an eye out how your stations are doing.