# Games

Get your game on!

# Wine

Wine is a compatibility layer which translates Windows system calls into comparable Linux equivalents. This allows (most) Windows applications to run on Linux, including many games.

Wine can be installed from the repositories. Recommended additional components:

* `wine-gecko`: Components for displaying web content
* `wine-mono`: Components for running .NET applications
* `winetricks`: Install various tools and libraries in a Wine prefix

~~~bash
sudo pacman -S wine wine-gecko wine-mono winetricks
~~~

## DXVK

Game performance can be significantly improved by installing *DXVK* in a Wine prefix. *DXVK* translates Direct3D calls from the DirectX 8/9/10/11 API to Vulkan to achieve improved 3D performance compared to WineD3D.

*DXVK* can be installed relatively easily in a Wine prefix using `winetricks`:

<div class="callout info">
  <p><strong>NOTE:</strong> If you've set up Wine with a non-default prefix (i.e. your Wine "installation" does not reside under <code>~/.wine</code>) you will need to supply the path in an environment variable:</p>
  <pre><code>WINEPREFIX=<em>/path/to/your-prefix</em> winetricks dxvk</code></pre>
</div>

<p class="callout danger"><strong>WARNING:</strong> DXVK overrides the DirectX 10 and 11 DLLs, which may be considered cheating in online multiplayer games, and may get your account <strong>banned</strong>. Use at your own risk!</p>

~~~bash
winetricks dxvk
~~~

It's also possible to install a specific *DXVK* version, if needed:

~~~bash
winetricks dxvk1103
~~~

Alternatively, *DXVK* can also be installed via the AUR:

~~~bash
yay -S dxvk-bin
~~~

Install via the included helper program:

<div class="callout info">
  <p><strong>NOTE:</strong> The same conditions about non-default prefix locations still apply:</p>
  <pre><code>WINEPREFIX=<em>/path/to/your-prefix</em> setup_dxvk install --symlink</code></pre>
</div>

~~~bash
setup_dxvk install --symlink
~~~

This places symbolic links into the Wine prefix, which means when *DXVK* gets updated during system upgrades, all Wine prefixed are updated along with it.

## VKD3D

*VKD3D* is the translation layer for Direct3D 12 to Vulkan. The latest version is installable through `winetricks`:

<div class="callout info">
  <p><strong>NOTE:</strong> The same conditions about non-default prefix locations still apply:</p>
  <pre><code>WINEPREFIX=<em>/path/to/your-prefix</em> winetricks vkd3d</code></pre>
</div>

~~~bash
winetricks vkd3d
~~~

*VKD3D* is also available from the AUR:

~~~bash
yay -S vkd3d-proton-bin
~~~

<div class="callout info">
  <p><strong>NOTE:</strong> The same conditions about non-default prefix locations still apply:</p>
  <pre><code>WINEPREFIX=<em>/path/to/your-prefix</em> setup_vkd3d_proton install --symlink</code></pre>
</div>

~~~bash
setup_vkd3d_proton install --symlink
~~~

This way when you upgrade to a new version of *VKD3D*, every prefix automatically gets updated as well.

## Synchronization primitives

Games heavily rely on Windows synchronization primitives for multi-threaded workloads. Since Linux kernel version 6.14 the NTSync kernel module is available, which more closely resembles Windows synchronization primitives. Wine 10.16 and later automatically use NTSync when it is detected to improve performance in CPU-bound scenarios.

To load the kernel module at boot create a file in `/etc/modules-load.d/` with the content `ntsync`:

~~~bash
echo ntsync | sudo tee /etc/modules-load.d/ntsync.conf
~~~

## MIDI Playback

Some Windows games still use MIDI playback for music. In order for this to work in Wine, a sequencer has to be installed, e.g. `fluidsynth`:

<p class="callout info"><strong>NOTE:</strong> FluidSynth uses soundfonts to render MIDI music.</p>

~~~bash
pacman -S fluidsynth soundfont-fluid
~~~

FluidSynth comes with a systemd user unit to run it in daemon mode. Edit the file `/etc/conf.d/fluidsynth` and uncomment the lines with the environment variables. Point the `SOUND_FONT` variable to a soundfont file in `*.sf2` format (refer to [DOSBox](/books/arch-linux/page/dosbox) for a list of available soundfonts for installation). Furthermore, adjust the `OTHER_OPTS` variable to use the appropriate audio backend that you are using, e.g. set parameter `-a pipewire` if you're using PipeWire instead of PulseAudio:

~~~
# Mandatory parameters (uncomment and edit)
SOUND_FONT=/usr/share/soundfonts/FluidR3_GM.sf2

# Additional optional parameters (may be useful, see 'man fluidsynth' for further info)
OTHER_OPTS='-a pipewire -m alsa_seq -p FluidSynth\ GM -r 48000'
~~~

After you've set everything up, enable/start the systemd user unit with:

<p class="callout warning"><strong>ATTENTION:</strong> Enable/start the unit as regular user, i.e. do not use <code>sudo</code>!</p>

~~~bash
systemctl --user enable --now fluidsynth
~~~

# Steam

The popular game distribution platform and library management client from Valve.

<p class="callout info"><strong>NOTE:</strong> activate the <code>multilib</code> repository in <code>/etc/pacman.conf</code> to install Steam/Proton.</p>

~~~bash
pacman -S steam
~~~

## Manage Steam compatibility tools

Apart from Valve's Proton distribution, there are other compatibility tools available with patches and performance improvements for games.

[ProtonUp-Qt](https://davidotek.github.io/protonup-qt/) is a graphical utility to manage many different compatibility tools, not only for Steam but also other launchers like Heroic Games Launcher.

It's available from the AUR:

~~~bash
yay -S protonup-qt
~~~

Another management tool that integrates with the look & feel of the GNOME desktop is [ProtonPlus](https://protonplus.vysp3r.com/), also available in the AUR:

~~~bash
yay -S protonplus
~~~

## Where are my game saves for Proton-enabled games?

Games that are running via Steam Proton on Linux all use their own Wine prefix. The location of game data is here:

~~~
~/.steam/steam/steamapps/compatdata/[game ID]/pfx
~~~

You can look up a game's ID by accessing its properties in the steam client:

1. Right-click on the game
1. Select "Properties..."
1. Go to "Updates"
1. Note down the "App ID"

Then navigate the directory structure in the `drive_c/` subdirectory that replicates a Windows directory structure. Personal files are under the `drive_c/users/steamuser/` directory.

# DOSBox

Install DOSBox Staging for a more enhanced DOS gaming experience:

~~~bash
yay -S dosbox-staging
~~~

## General MIDI/Soundfonts
The integrated FluidSynth MIDI sequencer has issues with some soundfont files, resulting in minor to major music playback issues in games. Timidity++ does not have these issues.

To install simply:

~~~bash
pacman -S timidity++
~~~

A list of available soundfonts to install from the AUR, [sorted by votes](https://aur.archlinux.org/packages?K=soundfont&SB=v&SO=d):

| AUR Package Name          | Description                                                                                                         |
|---------------------------|---------------------------------------------------------------------------------------------------------------------|
| `soundfonts-aur-meta`     | Installs all the soundfont packages in the AUR                                                                      |
| `soundfont-unison`        | A lean and clean GM/GS soundbank                                                                                    |
| `soundfont-sgm`           | A balanced, good quality GM soundbank                                                                               |
| `soundfont-titanic`       | A public domain, high quality MIDI soundfont by Luke Sena                                                           |
| `soundfont-generaluser`   | A small and well balanced GM/GS soundbank for many styles of music.                                                 |
| `soundfont-zeldamcsf2`    | Legend of Zelda: Minish Cap soundfont for MIDI playback                                                             |
| `soundfont-zelda3sf2`     | Legend of Zelda: Link to the Past soundfont for MIDI playback                                                       |
| `soundfont-fatboy`        | A free GM/GS SoundFont for classic video game MIDI, emulation, and general usage                                    |
| `soundfont-arachno`       | GM/GS soundbank courtesy of Maxime Abbey.                                                                           |
| `soundfont-sso-sf2`       | The Sonatina Symphonic Orchestra by Mattias Westlund. (SF2 format)                                                  |
| `soundfont-toh`           | Don Allen's Timbres of Heaven soundfont                                                                             |
| `soundfont-opl3-fm-128m`  | A SoundFont designed to simulate the classic MIDI sound of the Sound Blaster 16 (and other YM262 enabled hardware). |
| `soundfont-sunshine-perc` | Five drum/percussion soundfonts from Sunshine Studios. Non-commercial use only.                                     |
| `soundfont-realfont`      | GM soundbank by Michel Villeneuve                                                                                   |
| `soundfont-personalcopy`  | A large free SoundFont.                                                                                             |
| `soundfont-jeux`          | Jeux organ soundfont                                                                                                |

Configure Timidity++ to use the soundfont of your choosing in its global config file `/etc/timidity++/timidity.cfg`:

~~~
soundfont /usr/share/soundfonts/FluidR3_GM.sf2
~~~

Set up `timidity++` to run in daemon mode and start with user login:

~~~bash
systemctl --user enable --now timidity
~~~

You need to tell DOSBox which MIDI Port to send MIDI data to. Install the `alsa-utils` package and list the available MIDI ports with `aconnect`:

~~~bash
pacman -S alsa-utils
aconnect -o
~~~

The output might look something like this:

~~~
client 14: 'Midi Through' [type=Kernel]
    0 'Midi Through Port-0'
client 128: 'TiMidity' [type=User,pid=89573]
    0 'TiMidity port 0 '
    1 'TiMidity port 1 '
    2 'TiMidity port 2 '
    3 'TiMidity port 3 '
~~~

In the configuration file for DOSBox, pass the client ID of the sequencer and the port to use on the `midiconfig` setting. The mididevice needs to be `default`. The syntax is `[client]:[port]`:

~~~ini
[midi]
mpu401     = intelligent
mididevice = default
midiconfig = 128:0
~~~

## Gravis UltraSound (GUS)

The Gravis UltraSound cards were technically advanced soundcards with sample-based music synthesis ("wavetable") and hardware-mixing. DOSBox can emulate a Gravis UltraSound card for games that support it.

To enable GUS emulation, set the following options in your DOSBox configuration file:

<p class="callout warning"><strong>IMPORTANT:</strong> The <code>ultradir</code> references a directory <strong>within</strong> DOSBox, not your local filesystem!</p>

~~~ini
gus      = true
gusbase  = 240
gusirq   = 5
gusdma   = 3
ultradir = C:\ULTRASND
~~~

Depending on where you mount your `C:` drive (e.g. `~/DOS`), the `ULTRASND` directory needs to be placed inside it.

### Installing GUS drivers

<div class="callout info">
  <p><strong>NOTE:</strong> Assumptions being made in this guide:</p>
  <ul>
    <li>The <code>C:</code> drive is mounted from <code>~/DOS</code></li>
    <li>The <code>X:</code> drive is mounted from <code>~/Downloads/GUS Install</code> and contains the GUS setup files</li>
  </ul>
</div>

<p class="callout warning"><strong>IMPORTANT:</strong> Make sure you turn on GUS emulation in DOSBox <strong>before</strong> starting the setup procedure!</p>

#### Preparations

GUS emulation needs the original install disks for the Gravis UltraSound, which can be downloaded [here](https://www.mediafire.com/?8mezjdsyuj3).

Create an `autoexec.bat` at the root of DOSBox's `C:` drive:

~~~bash
touch ~/DOS/autoexec.bat
~~~

#### In DOSBox

Extract the contents into a directory and mount it as drive `X:` in DOSBox:

~~~bash
mount x ~/Downloads/GUS Install
~~~

Change directory to the `GUS410` directory and start the installer:

~~~bash
X:
cd X:\GUS410
INSTALL.EXE
~~~

Setup procedure:

1. Choose `Restore`, **NOT** `Install`
1. When asked what to restore, provide the glob pattern `*.*`
1. Keep the default target drive letter
1. Keep the default target directory
1. Start the installation process

Back at the main menu:

1. Choose `Install` (since it is restored, the installation should be quick)
1. Keep the defaults for the drive and directory
   * If it can't find Windows, provide `C:\ULTRASND\WINDOWS`
1. When the installation completes successfully exit out
   * Don't run Express or Custom Setup

Change directory to the `GUS411` directory and start the installer:

~~~bash
cd X:\GUS411
INSTALL.EXE
~~~

Repeat the installation steps above.

#### Testing

To test if setup was successful restart DOSBox, change into `C:\ULTRASND` and start `MIDIDEMO.BAT`.

If you hear music being played, the installation was successful.

## Games with CD Audio

You can use [CBAE](https://github.com/john32b/cbae) to save some space with games that use CD audio tracks by compressing them.

`cbae` is a NodeJS package that is installed via `npm`. If you don't have NodeJS already installed:

~~~bash
pacman -S nodejs
~~~

Then install the `cbae` package **globally**:

~~~bash
npm i cbae --location=global
~~~

`cbae` takes .bin/.cue images as input and uses the information of the .cue file to determine what the CD audio tracks are.

To convert a .bin/.cue image:

~~~bash
cbae e KEEPER.cue -o ./ -enc OPUS:64 -p $(nproc)
~~~

This achives the following:
* `e KEEPER.cue`: encodes CD audio tracks of the image `KEEPER.cue`
* `-o ./`: outputs the resulting files into a sub-directory of the current directory, e.g.:
  ~~~
  KEEPER.bin
  KEEPER.cue        <-- input file
  KEEPER [e]        <-- sub-directory
  ├── KEEPER.cue                <-- new .cue file by cbae
  ├── KEEPER - Track 01.bin     <-- binary game data
  ├── KEEPER - Track 02.opus    <-- CD audio track
  ├── KEEPER - Track 03.opus
  ├── KEEPER - Track 04.opus
  ├── KEEPER - Track 05.opus
  ├── KEEPER - Track 06.opus
  └── KEEPER - Track 07.opus
  ~~~
* `-enc OPUS:64`: encodes audio tracks with Opus at 64 kbps (see `cbae --help` for available codecs)
* `-p $(nproc)`: specifies how many CPU cores are used for encoding (`$(nproc)` assigns the maximum number of cores available)

Mount the newly created .cue file with DOSBox's `imgmount` command, e.g. as the D: drive:

~~~bash
imgmount d ~/DOSGAMES/KEEPER [e]/KEEPER.cue -t cdrom
~~~

# ScummVM

Dabble in some adventure games of yore with ScummVM:

~~~bash
pacman -S scummvm
~~~

# OpenRCT2
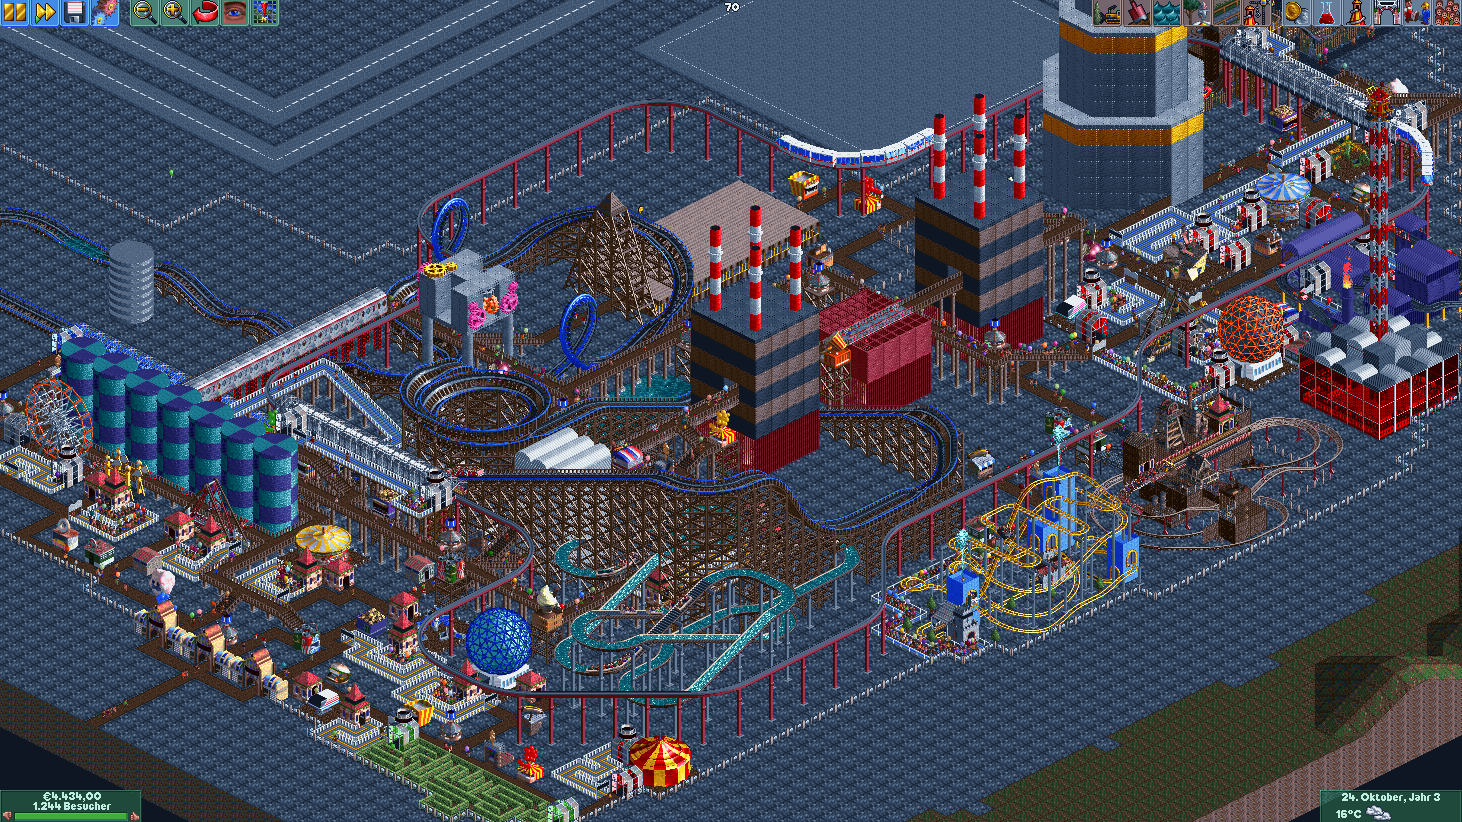
![Screenshot of OpenRCT2](https://wiki.sebin-nyshkim.net/uploads/images/gallery/2026-03/scaled-1680-/openrct2.png)

<p class="callout warning"><strong>ATTENTION:</strong> A legitimate copy of the game is required to play!</p>

OpenRCT2 is an open-source re-implementation of RollerCoaster Tycoon 2 (RCT2), expanding the game with new features, fixing bugs and raising game limits.

<p class="callout info"><strong>NOTE:</strong> OpenRCT2 also supports RollerCoaster Tycoon 1 game files.</p>

~~~
pacman -S openrct2 innoextract
~~~

For the development version install the AUR package:

~~~bash
yay -S openrct2-git
~~~

If you have the [Steam version](https://store.steampowered.com/app/285330/) install RollerCoaster Tycoon 2 **before** launching OpenRCT2. OpenRCT2 will automatically search your Steam library for any existing installation of RollerCoaster Tycoon 2, Deluxe (RCT1) or "Classic" and start right up.

If you have the [GOG version](https://www.gog.com/game/rollercoaster_tycoon_2), go to your library, hover over the RollerCoaster Tycoon 2 entry and click on the arrow that appears. Select `Download offline backup game installers` and download the installer EXE. Upon first start, OpenRCT2 will prompt you to tell it where to find the GOG installer and it will install game files for you.

For other installation methods refer to the [OpenRCT2 docs](https://docs.openrct2.io/en/latest/installing/installing-on-linux-bsd.html).

# OpenTTD

![Screenshot of OpenTTD](https://wiki.sebin-nyshkim.net/uploads/images/gallery/2026-03/scaled-1680-/openttd.png)

OpenTTD is an open source simulation game based upon the popular Microprose game "Transport Tycoon Deluxe", written by Chris Sawyer. It attempts to mimic the original game as closely as possible while extending it with new features.

OpenTTD is available from the repositories:

~~~bash
pacman -S openttd
~~~

While a retail version of the game is not necessary to play, OpenTTD can make use of original game files for graphics, sound and music. Simply place the game files into the `~/.local/share/openttd/baseset` directory and the game will pick them up.

Additionally, there's open source graphics, sounds and music available from the repositories and the AUR:

~~~bash
yay -S openttd-open{gfx,sfx,msx}
~~~

## Music

OpenTTD's music is in MIDI format, which requires a software synthesizer to listen to it. By default, OpenTTD will use FluidSynth with the *FluidR3* soundfont. Since this soundfont is neither required explicitly nor optionally by either OpenTTD or FluidSynth it needs to be installed manually:

~~~bash
pacman -S soundfont-fluid
~~~

If you want to use a different soundfont you can set up the OpenTTD music driver in the config file to use a non-default one, e.g. a soundfont that mimics the sound of the popular OPL3 chip from the 90s:

~~~bash
yay -S soundfont-opl3-fm-128m
~~~

Open `~/.config/openttd/openttd.cfg` and modify the `musicdriver` setting in the `[misc]` section:

~~~ini
[misc]
...
musicdriver = "fluidsynth:soundfont=/usr/share/soundfonts/OPL-3_FM_128M.sf2"
~~~

## High Resolution Graphics

OpenTTD has support for high resolution graphic packs. One such pack is OpenGFX2, which comes in both standard and high resolution variants. The high resolution pack is still a work in progress but already shows nice improvements at 4x zoom.

The high resolution pack needs to be downloaded manually from the [GitHub releases page](https://github.com/OpenTTD/OpenGFX2/releases). Copy the downloaded `OpenGFX2_HighDef-x.y.z.tar` file to `~/.local/share/openttd/content_download/baseset` and select the pack from the in-game options.

## Recommended Settings

There are some game settings that make OpenTTD a more enjoyable experience. Go to the game options, select the "Advanced" tab and change the following:

- Graphics
  - Thickness of lines in graphs: **5**
- Interface
  - Construction
    - Link landscape toolsbar to rail/road/water/airport toolbars: **On**
    - Default rail type (after new game/game load): **Last available**
    - Automatically remove signals during rail construction: **On**
  - Show the cargoes the vehicles can carry in the list windows: **On**
- News/Advisors
  - Changes to cargo acceptance: **Off**
  - Arrival of first vehicle at player's station: **Off**
  - Arrival of first vehicle at competitor's station: **Off**
  - Show finances windows at the end of the year: **Off**
  - Closing of industries: **Off**
- Limitations
  - Allow level crossings with roads or rails owned by competitors: **Off**
- Environment
  - Time
    - Automatically pause when starting a new game: **On**
  - Towns
    - Towns are allowed to build level crossings: **Off**
    - Road layout for new towns: **3x3 grid**
  - Industries
    - Manual primary industry construction method: **Prospecting**

# CorsixTH

![Screenshot of CorsixTH](https://wiki.sebin-nyshkim.net/uploads/images/gallery/2026-03/scaled-1680-/corsixth.png)

<p class="callout warning"><strong>ATTENTION:</strong> A legitimate copy of the game is required to play!</p>

CorsixTH aims to re-implement the game engine of Theme Hospital with support for modern operating systems and several bug fixes and quality of life improvements to the game.

~~~bash
yay -S corsix-th innoextract
~~~

If you have the original retail CD version, copy the `HOSP` folder to your hard drive. Upon first start, CorsixTH will prompt you to point it to the data file directory

If you have the [GOG version](https://www.gog.com/game/theme_hospital), go to your library, hover over the Theme Hospital entry, click the arrow that appears and choose `Download offline backup game installers`. Extract the installer with `innoextract`:

~~~bash
innoextract setup_theme_hospital_v3_\(28027\).exe \
  -d ~/Games/HOSP \
  -I ANIMS \
  -I DATA \
  -I DATAM \
  -I INTRO \
  -I LEVELS \
  -I QDATA \
  -I QDATAM \
  -I SOUND \
  -I CONNECT.BAT \
  -I DOS4GW.EXE \
  -I HOSPITAL.CFG \
  -I HOSPITAL.EXE \
  -I manual.pdf \
  -I MODEM.INI \
  -I NETPLAY.TXT \
  -I README.TXT \
~~~

This will extract only necessary files (excluding the extra GOG files) to `~/Games/HOSP`. Either point the game to this path or move it to somewhere else that's more to your liking.

For more detailed instructions see the [CorsixTH Github Wiki](https://github.com/CorsixTH/CorsixTH/wiki/Getting-Started).

## Music

CorsixTH allows for external high quality music files to play instead of the MIDI soundtrack.

There is a remixed version of the Theme Hospital soundtrack on YouTube by *Krytie2X4B* with a link to the [soundtrack in OGG format](https://www.dropbox.com/s/rjjoh9u0v6u3xjc/Theme%20Hospital%20Remastered%20%28Krytie2X4B%29%20OGG.zip) on Dropbox.

Extract the files to a location of your choosing and point the game to it from the in-game settings.

# ioquake3
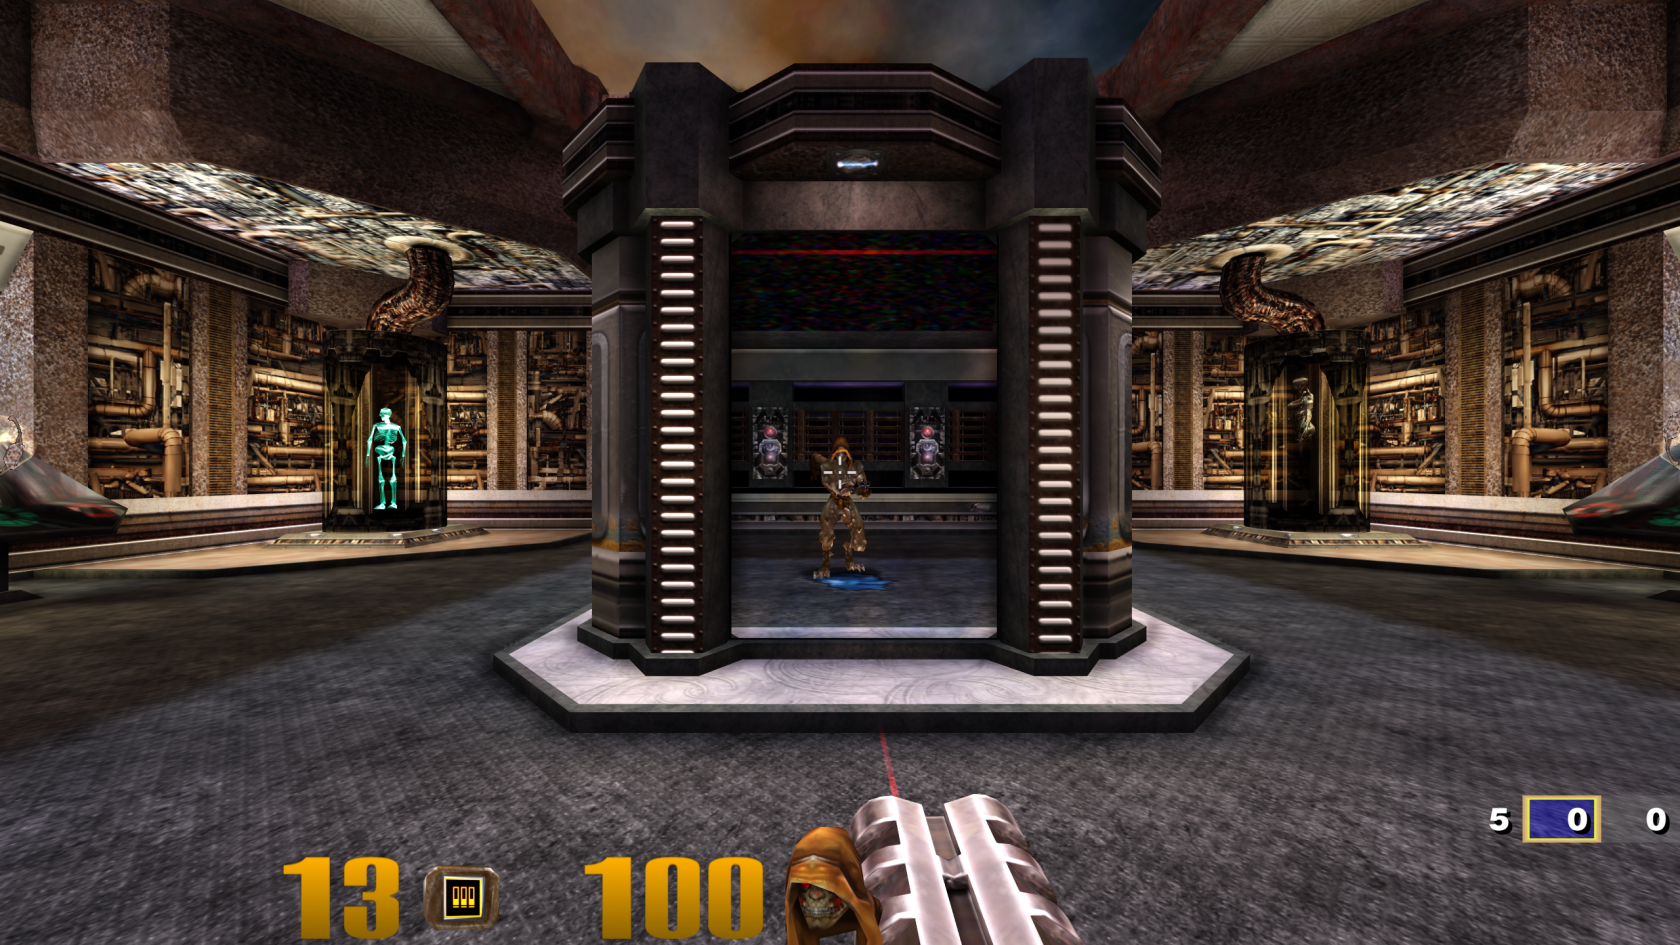
![ioquake3 modded with high resolution textures and widescreen fix](https://wiki.sebin-nyshkim.net/uploads/images/gallery/2026-03/scaled-1680-/bildschirmfoto-20260321-135924.png)

<p class="callout warning"><strong>ATTENTION:</strong> A legitimate copy of the game is required to play!</p>
  
ioquake3 is a free and open source first person shooter engine based on the *Quake III: Arena* and *Quake III: Team Arena* source code.

ioquake3 is available from the AUR:

~~~bash
yay -S ioquake3
~~~

If you don't want to compile the game every time there's an update, the Flatpak version is available:

~~~bash
flatpak install org.ioquake3.ioquake3
~~~

## Game assets

*ioquake3* requires the original *Quake III: Arena* game files in order to function, mainly the file `pak0.pk3` from [Steam](https://store.steampowered.com/app/2200/), [GOG](https://www.gog.com/game/quake_iii_gold) or the retail CD release.

Navigate to the `baseq3` directory of your original game and copy the `pak0.pk3` file to the appropriate location for your chosen installation of *ioquake3*. You can start the game once and it will tell you where it expects the files and create the directory structure for you.

| Install method | Directory                                          |
| -------------- | -------------------------------------------------- |
| Single user    | `~/.q3a/baseq3/`                                   |
| System-wide    | `/opt/quake3/baseq3/`                              |
| Flatpak        | `~/.var/app/org.ioquake3.ioquake3/data/q3a/baseq3` |

Next, grab the patch data from the [ioquake3 website](https://ioquake3.org/extras/patch-data/) and copy the contents into the `baseq3` directory as well, so it has `pak0.pk3` through `pak8.pk3`.

## Settings

Once the game files are installed, start the game once, accept an empty CD key and exit out again. This will make the game create a config file in your home directory that you can edit to enable higher resolutions.

Open `baseq3/q3config.cfg` and edit the following values:

~~~c
seta cg_fov         "120"  // Field of view
seta com_maxfps     "125"  // Optimal `125`, `200` or `333`
seta cl_maxpackets  "125"  // Same as `com_maxfps` or half
seta r_mode         "-1"   // Resolution mode, `-1` = custom
seta r_customwidth  "2560" // Custom resolution width
seta r_customheight "1440" // Custom resolution height
~~~

A lot more configuration options are explained [here](https://forum.fpsclassico.com/quake-3-config.php) (optional).

## High resolution textures & widescreen fix (optional, but recommended)

There exist mods to enhance a few aspects of the game:

- [Widescreen fix](https://clover.moe/flexible-hud-for-ioq3/)
- [High resolution fonts and HUD](https://www.moddb.com/mods/high-quality-quake)
- [High resolution texture pack](https://ioquake3.org/extras/replacement_content/)

Put the `.pk3` files from these downloads next to the others in your `baseq3` directory.

These will make the game play nicely with modern graphics and updates the settings menu to allow you to set proper resolutions for HD displays.

# DXX-Rebirth

<div class="callout warning">
  <p>Legitimate copies of the games are required to play, either bought from</p>
  <ul>
    <li>GOG.com
      <ul>
        <li><a href="https://www.gog.com/game/descent">Descent 1</a></li>
        <li><a href="https://www.gog.com/game/descent_2">Descent 2</a></li>
      </ul>
    </li>
    <li>the retail CD versions</li>
  </ul>
  <p>Further info can be found on the <a href="https://www.dxx-rebirth.com/game-content/">DXX-Rebirth Website</a> (<code>innoextract</code> is needed for extraction).</p>
</div>

DXX-Rebirth is a source port of the Descent and Descent 2 Engines so you won’t need DOSBox to play the games. Additionally, it offers OpenGL graphics and effects, advanced Multiplayer, many improvements and new features.

~~~bash
yay -S d1x-rebirth d2x-rebirth innoextract
~~~

Copy the Descent 1 game files:

~~~bash
# single user
cp descent.(hog|pig) ~/.d1x-rebirth/

# system-wide
cp descent.(hog|pig) /usr/share/d1x-rebirth/
~~~

Copy the Descent 2 game files:

~~~bash
# single user
cp *.(ham|hog|pig|s11|s22) ~/.d2x-rebirth/

# system-wide
cp *.(ham|hog|pig|s11|s22) /usr/share/d2x-rebirth/
~~~

# Minecraft

[![Screenshot of Minecraft](https://wiki.sebin-nyshkim.net/uploads/images/gallery/2026-03/scaled-1680-/minecraft.png)](https://wiki.sebin-nyshkim.net/uploads/images/gallery/2026-03/minecraft.png)

Minecraft is a sandbox game originally released by Mojang. It lets players explore, build, and survive in a procedurally generated world made up of blocks. The game is open ended with no set goals. It can be played in single player or enjoyed with friends in online multiplayer mode.

The most straightforward way to install Minecraft is to use the official launcher from the AUR:

~~~bash
yay -S minecraft-launcher
~~~

You will need a Microsoft Account to log into the launcher. Game updates will be handled automatically throught the launcher.

## Modding

A vibrant community has formed around Minecraft, developing mods and enhancements for the game. However, installing these mods manually can sometimes be a tedious process. That’s why there are special launchers designed to greatly simplify this process.

![Screenshot of Prism Launcher](https://wiki.sebin-nyshkim.net/uploads/images/gallery/2026-03/scaled-1680-/prismlauncher.png)

One of these is *Prism Launcher.* It has native integration with Modrinth and CurseForge to install and keep individual mods or entire modpacks up to date alongside the game itself. *Prism Launcher* also allows you to run multiple instances of Minecraft simultaneously, for example, to use different modpacks at the same time for online multiplayer servers that require this.

*Prism Launcher* is available from the repositories:

~~~bash
sudo pacman -S prismlauncher
~~~

<div class="callout warning">
  <p><strong>WARNING:</strong> There have been <a href="https://prismlauncher.org/news/cf-compromised-alert/" target="_blank">malware reports</a> in the past involving certain mods and modpacks. The Flatpak version of <em>Prism Launcher</em> can prevent some (but not all) malware exploits through the Flatpak sandbox:</p>
  <pre><code>flatpak install org.prismlauncher.PrismLauncher</code></pre>
</div>

Click "Add Instance" in the toolbar to get started. Choose a vanilla version of Minecraft or install a pre-defined modpack from the mod provider of your choice. Instances can be further customized after installation.

![Screenshot of Modlist of a Minecraft Instance](https://wiki.sebin-nyshkim.net/uploads/images/gallery/2026-03/scaled-1680-/prismlauncher-instance.png)

In the edit window of an instance you can add mods, resource and shader packs, pre-populate the server list, manage screenshots and override global settings, such as game configuration, Java runtime and other advanced settings.

# SimCity 3000 Unlimited

## Widescreen hack

SimCity 3000 does only support a set amount of resolutions, widescreen resolutions are not natively supported. You can work around that by editing the main executable file in a hex editor.

Open the main executable file `SC3U.exe` in a hex editor and search for the following byte sequence:

~~~
8b 4c 24 04 8b 44 24 08 53
~~~

Overwrite the first four bytes with:

~~~
c2 08 00 90
~~~

Next search for the byte sequence:

~~~
8b 4c 24 04 8b 54 24 08 81 f9
~~~

Overwrite the first four bytes with:

~~~
c2 08 00 90
~~~

The game will now allow much higher resolutions. Keep in mind, however, that the interface will not scale with the resolution and on really high resolutions the UI of the game might be displayed *really* small and might get hard to read.

## Scrolling speed fix

On modern systems, SimCity 3000 exhibits a scrolling bug in which the game scrolls way too fast.

To fix this, a mod can be installed, called cnc-ddraw. It limits the game's tickrate and adds a couple more neat features.

Download cnc-ddraw from the project's [GitHub releases page](https://github.com/FunkyFr3sh/cnc-ddraw/releases). Drop the files `ddraw.dll` and `ddraw.ini` into the installation directory of the game, next to the `SC3U.exe` file. Then, start the game with the environment variable `WINEDLLOVERRIDES=ddraw=n,b`. If you have the game on Steam, this can be easily achieved by opening the game's settings and adding the following line to the launch options:

~~~
WINEDLLOVERRIDES=ddraw=n,b %command%
~~~

### Shaders for upscaling

cnc-ddraw supports scaling with GLSL shaders. Download them from the [libretro GitHub](https://github.com/libretro/glsl-shaders) (Code → Download ZIP) and extract it into a sub-directory in the same folder as the `ddraw.dll` file you copied earlier, e.g. `~/.steam/steam/steamapps/common/SimCity 3000 Unlimited/Apps/Shaders`.

Then edit `ddraw.ini` and set the following options (shortened, Ctrl-F the setting keys):

~~~ini
[ddraw]
shader=Shaders/interpolation/pixellate.glsl
renderer=opengl
~~~

# UT2004 (Atari DVD Release Version)

Install from the DVD. Navigate to the location the DVD was mounted at and run:

~~~bash
sudo sh ./linux-installer.sh
~~~

Follow the installation steps.

After installation completes **do not run the game immediately after install**. Patch first!

## Patch to latest version

The patch can be downloaded here: 
⬇️ [UT2004 Mega Pack Linux + LinuxPatch 3369.2 - utzone.de](https://utzone.de/forum/downloads.php?do=file&id=1194_UT2004-Mega-Pack-Linux-+-LinuxPatch-3369.2)

Extract contents from the archive and copy them to the install location, overwriting all the files:

<p class="callout info"><strong>NOTE:</strong> If <code>cp</code> is asking for confirmation on every file, it is likely there is an alias to <code>cp -i</code>. Prepend a <code>\</code> before the <code>cp</code> command to temporarily ignore this alias. Alternatively, <code>unalias cp</code> to undefine the alias.</p>

~~~bash
tar -xf ut2004megapack-linux -C /tmp/
cp -R /tmp/UT2004MegaPack/* /usr/local/games/ut2004
~~~

## Launch in 64-bit

By default, the `ut2004` command will launch the 32-bit version of the game. To make it launch the 64-bit version, edit the start script `/usr/local/games/ut2004/ut2004` and change **line 49** from

~~~
	exec "./ut2004-bin" $*
~~~

to

~~~
	exec "./ut2004-bin-linux-amd64" $*
~~~

## Missing libraries

The game tries to load quite some old libraries, e.g. it will complain about `libSDL-1.2.so.0` or `libstdc++.so.5` missing.

In the case of `libSDL-1.2.so.0` simply install the SDL 1.2 compatability package:

~~~bash
pacman -S sdl12-compat
~~~

Then, remove the `libSDL-1.2.so.0` the game came with and put a symbolic link to your system's `libSDL-1.2.so.0`

~~~bash
sudo rm /usr/local/games/ut2004/System/libSDL-1.2.so.0
sudo ln -sf /usr/lib/libSDL-1.2.so.0 /usr/local/games/ut2004/System/libSDL-1.2.so.0 
~~~

To fix the error about `libstdc++.so.5`, an AUR package with the files is available:

~~~bash
yay -S libstdc++5
~~~

## No sound

UT2004 expects there to be a `/dev/dsp` sound device to access the sound card directly. This goes back to OSS (Open Sound System) which has long been deprecated in favor of ALSA and contemporaries.

This can easily be fixed in one of two ways:

1. Further edit the start script of `ut2004`, prepending the execution of the game binary with `padsp` to route all audio through PulseAudio:
    ~~~
    	exec padsp "./ut2004-bin-linux-amd64" $*
    ~~~
1. Edit your user's UT2004 config file `~/.ut2004/System/UT2004.ini`, go to the section `[ALAudio.ALAudioSubsystem]` and change the value of `UseDefaultDriver=True` to `UseDefaultDriver=False`

## Screen resolution

Some higher resolutions might not show up in the game's configuration screen. To set a resolution manually, edit your user's UT2004 config file, go to section `[SDLDrv.SDLClient]` and set the following parameters, e.g.:

<p class="callout warning"><strong>ATTENTION:</strong> The config file contains two sections for various graphical settings, one for Windows and one for Linux. The one for Linux comes after the one for Windows.</p>

~~~ini
[SDLDrv.SDLClient]
FullscreenViewportX=2560
FullscreenViewportY=1440
~~~

## Proper wide-screen support

A mod is available that expands UT2004's wide-screen support: [foxWSFix-UT2k4](https://github.com/alexstrout/foxWSFix-UT2k4)